Nil Returns is a type of KRA Returns that is normally filed by individuals who don’t have any source of income here in Kenya. In other words, if you don’t derive any income from Business, Employment or Rental, then you are required to file Nil Returns online using iTax (KRA Portal).
The group of taxpayers that is normally associated with the filing of Nil Returns are both the Students and Unemployed individual in Kenya. If you fall in this category, you need to ensure that you file your Nil Returns or before the elapse of the 30th June deadline set by Kenya Revenue Authority (KRA).
To be able to file Nil Returns on iTax (KRA Portal), you first need to ensure that you didn’t derive any income for the tax period that you are filing Nil Returns for i.e. no income from employment, business or rental. Next, you need to also have with you both your KRA PIN Number and KRA Password (iTax Password).
READ ALSO: Step-by-Step Process of Downloading KRA PIN Certificate
Both of these two form part of the login credentials that you need in the process of How To File Nil Returns online quickly and easily. Below is the step-by-step process that you need to follow so as to be able to file Nil Returns successfully on iTax (KRA Portal).
How To File Nil Returns
Step 1: Visit iTax (KRA Portal)
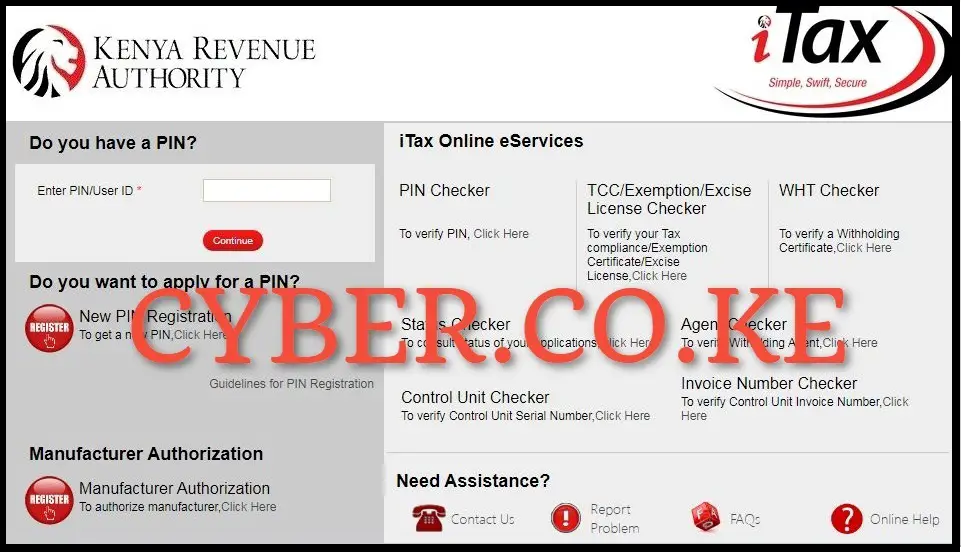
The process of filing Nil Returns on iTax (KRA Portal) normally begins by first visiting iTax (KRA Portal) by using https://itax.kra.go.ke/KRA-Portal/
Step 2: Login Into iTax (KRA Portal)
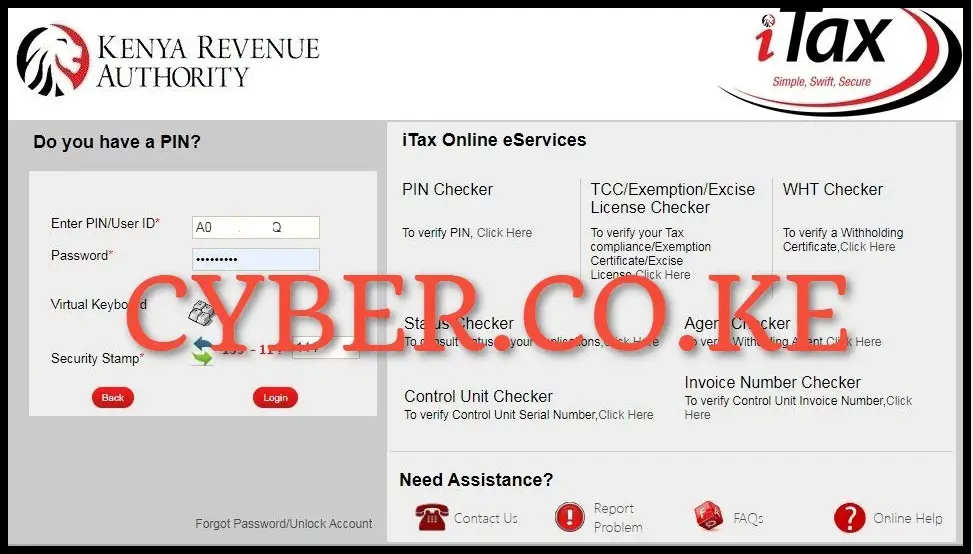
Once you are on iTax (KRA Portal), you need to login by entering your KRA PIN Number, KRA Password (iTax Password), solve the arithmetic question (security stamp) then click on the “Login” button.
Step 3: Click on Returns Module (Menu) then File Nil Return
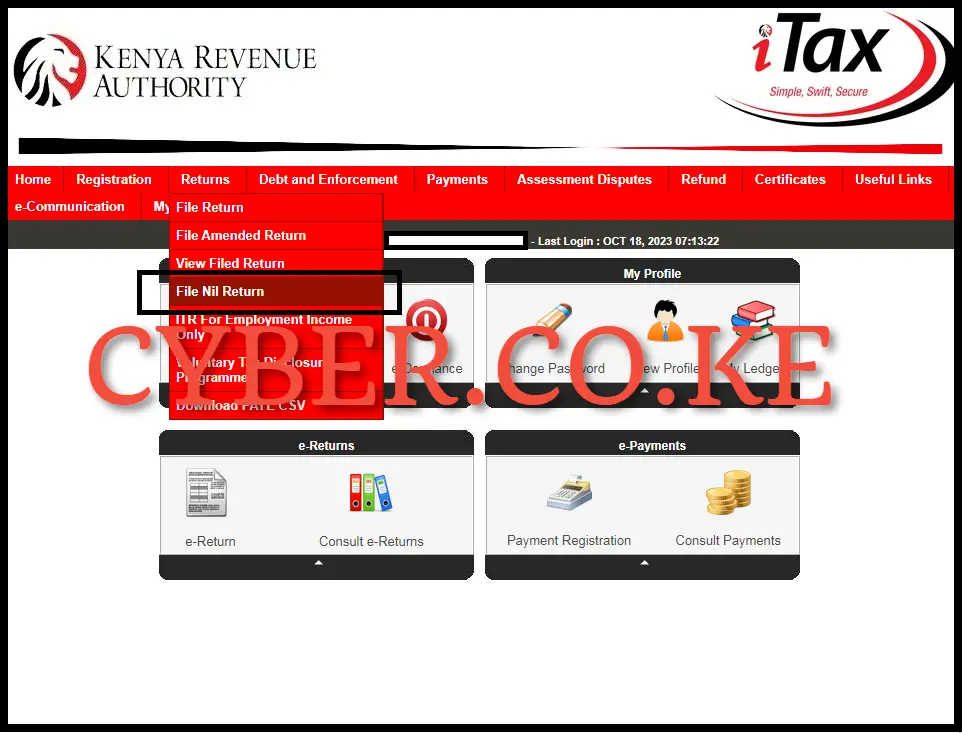
Upon successful logging in process, on the top menu, click on “Returns” module then proceed to click on “File Nil Returns” from the drop down menu item list.
Step 4: Select KRA Tax Obligation
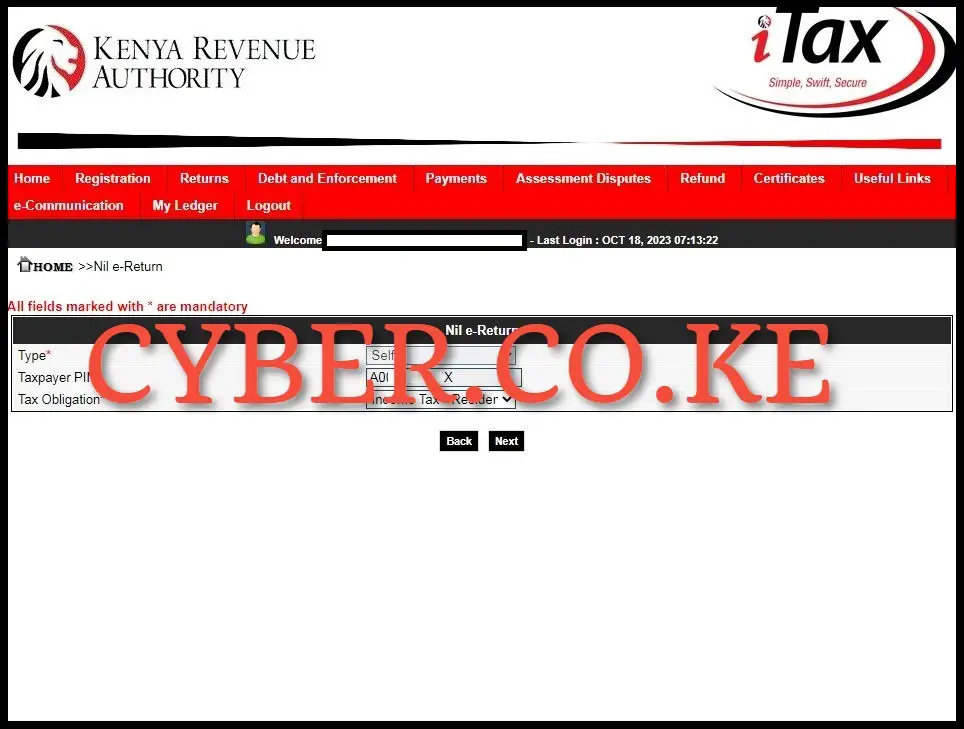
In this step, you need to select the KRA Tax Obligation that you are filing the Nil Returns for. In our case, you need to select “Income Tax – Resident Individual.” After selecting this as the type of Tax Obligation, proceed to the next step by clicking on the “Next” button.
Step 5: Fill In The Income Tax – Resident Individual Nil e-Return Form
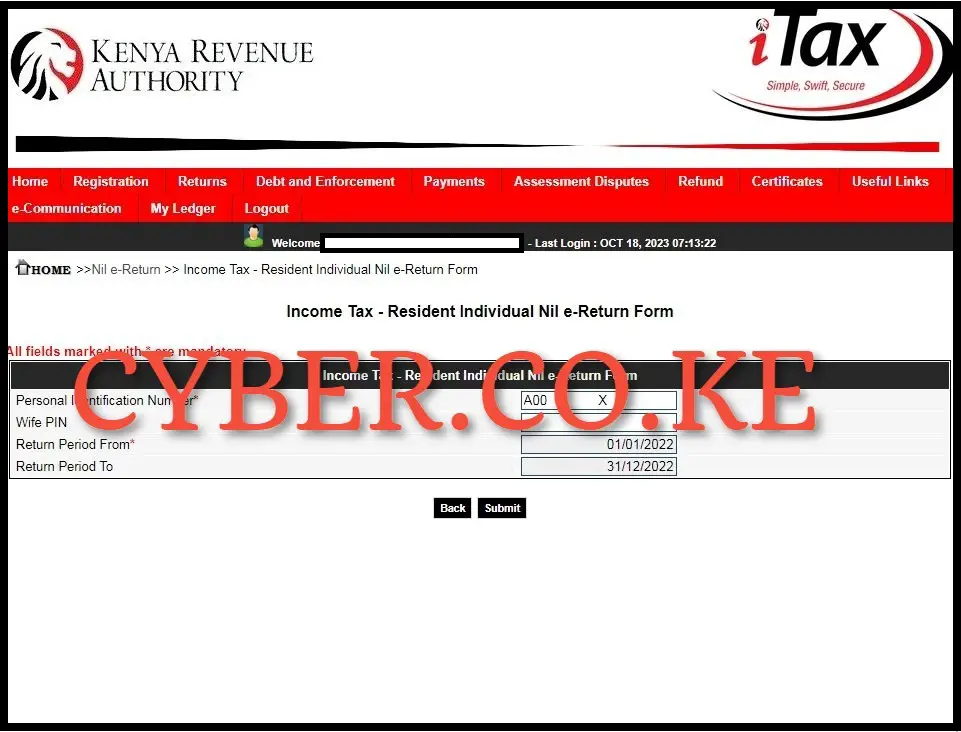
Next, you need to fill in the Income Tax Resident Individual Nil e-Return Form which is the basic form for filing Nil Returns on iTax (KRA Portal). The part of the Nil e-Return Form that you are supposed to fill in is the Return Period From which will auto-populate the Return Period To. As an example, if you are filing Nil Returns for the year 2023, the Return Period From will be 01/01/2023 and the Return Period To will be 31/12/2023. Once you have filled in the Nil e-Return Form, click on the “Submit” button.
Step 6: Download Nil Returns Acknowledgement Receipt
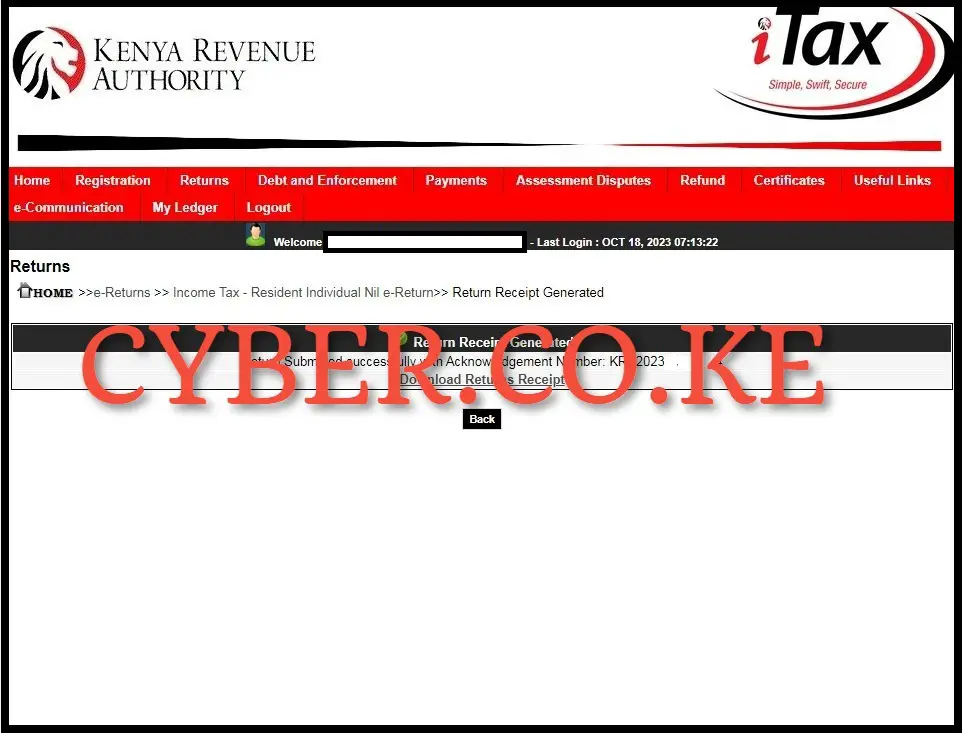
The last step in the whole process of Filing Nil Returns using iTax (KRA Portal), is the downloading of the generated Nil Returns Acknowledgement Receipt. The Nil Returns Receipt serves as a final confirmation that you have successfully filed your Nil Returns on iTax (KRA Portal) and the same has been received by Kenya Revenue Authority (KRA). To download the Nil Returns Acknowledgment Receipt, just click on the text link that is labeled “Download Returns Receipt” to download and save the e-Return Acknowledgement Receipt on your device.
READ ALSO: Step-by-Step Process of Reprinting KRA PIN Certificate
The process of filing Nil Returns on iTax (KRA Portal) encompasses following the above 6 main steps. Just as a reminder, filing of Nil Returns is only for individuals in Kenya who don’t have any source of income. Secondly, you need to ensure that you have with you both your KRA PIN Number and iTax Password (KRA Password), which are needed in the process of logging into iTax (KRA Portal) so as to be able to file Nil Returns quickly and easily. Once you have all these with you, you can follow the outlined steps above on How To File Nil Returns on iTax (KRA Portal).

Matthews Ohotto is an Article Writer at CYBER.CO.KE and a Video Creator on the YouTube Channel Cyber Services Kenya, specializing in crafting insightful and informative Blog Posts and Video Tutorials that empower Kenyans with practical skills and knowledge. Holding a Bachelor’s Degree in Business Information Technology (BBIT) from JKUAT, he blends technical expertise with a passion for clear and impactful communication. Do you need his help? Email Address: [email protected]
KRA PIN REGISTRATION
Are you looking for KRA PIN Registration services?
We are here and ready to assist you today.
Submit your service request online now and let us handle everything for you.
Receive your KRA PIN Certificate via Email Address and WhatsApp in a few minutes.
KRA PIN RETRIEVAL
Are you looking for KRA PIN Retrieval services?
We are here and ready to assist you today.
Submit your service request online now and let us handle everything for you.
Receive your KRA PIN Certificate via Email Address and WhatsApp in a few minutes.
KRA PIN UPDATE
Are you looking for KRA PIN Update services?
We are here and ready to assist you today.
Submit your service request online now and let us handle everything for you.
Receive your KRA PIN Certificate via Email Address and WhatsApp in a few minutes.
KRA PIN CHANGE OF EMAIL ADDRESS
Are you looking for KRA PIN Change of Email Address services?
We are here and ready to assist you today.
Submit your service request online now and let us handle everything for you.
Receive your KRA PIN Certificate via Email Address and WhatsApp in a few minutes.

