The KRA PIN (Personal Identification Number) is a unique identifier that is used for various tax purposes here in Kenya. Citizens and non-citizens earning income must register for a KRA PIN to comply with tax regulations that are set out by Kenya Revenue Authority (KRA). You can now easily apply and register for KRA PIN online using eCitizen quickly and easily. KRA allows taxpayers to apply for KRA PIN Number using either iTax (KRA Portal) or eCitizen. In this blog post, we shall cover How To Apply for KRA PIN using eCitizen. This post covers those who already have an eCitizen account and want to apply for KRA PIN Number using eCitizen.
READ ALSO: How To Download P9 Form Online Quickly and Easily
For you to be able to apply for KRA PIN using eCitizen, you need to ensure that you already have an eCitizen account. So, if you fall in this category, you can easily use your eCitizen account to apply and register for KRA PIN Number online. If you don’t have an eCitizen account, you can refer to our posts on How To Create eCitizen Account and How To Register for an eCitizen Account. As mentioned above, in this blog post, we shall look at the main steps that you need to follow in order to register KRA PIN using eCitizen quickly and easily today.
How To Apply For KRA PIN Using eCitizen
The following are the 14 main steps involved in the process of How To Apply For KRA PIN Using eCitizen that you need to follow.
Step 1: Visit eCitizen.kra.go.ke
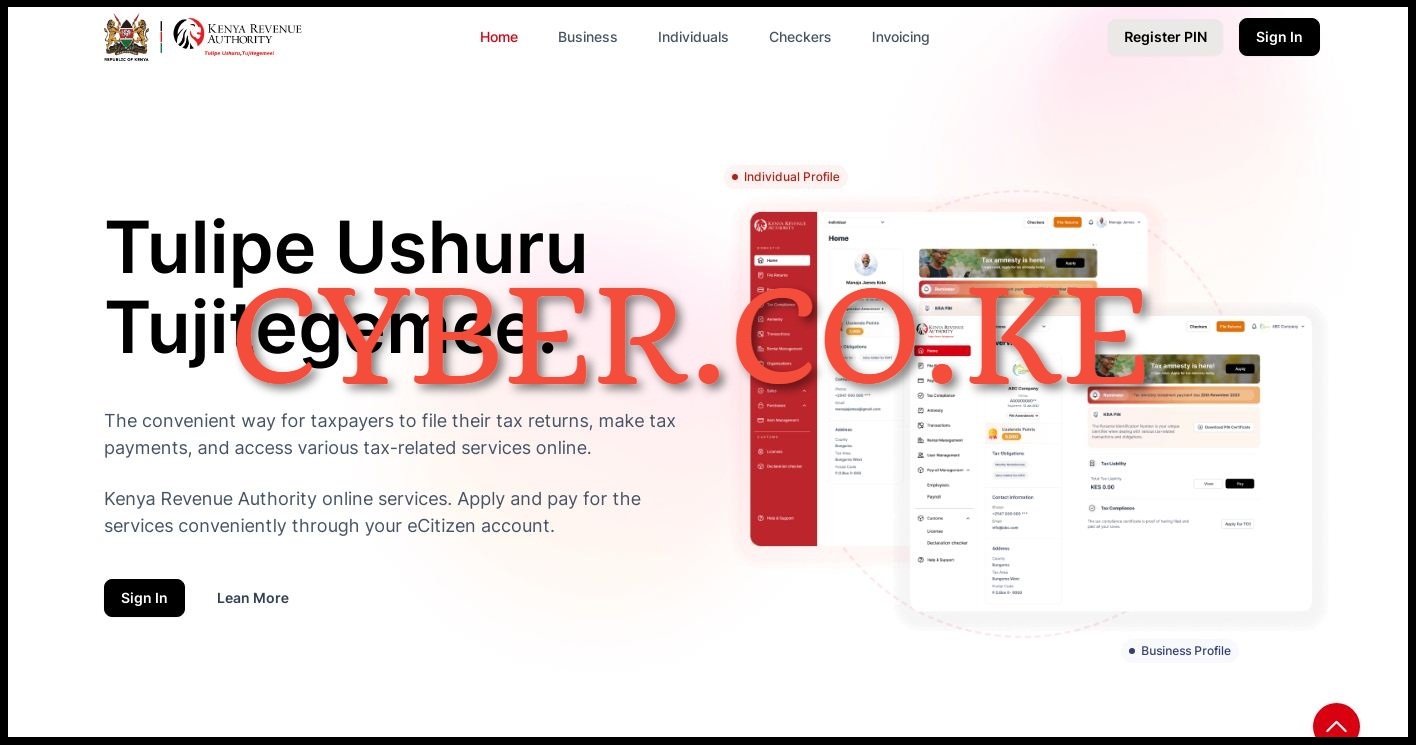
The first and foremost step in the process of applying for a new KRA PIN Number using eCitizen is to visit https://ecitizen.kra.go.ke/
Step 2: Click on Sign In Button
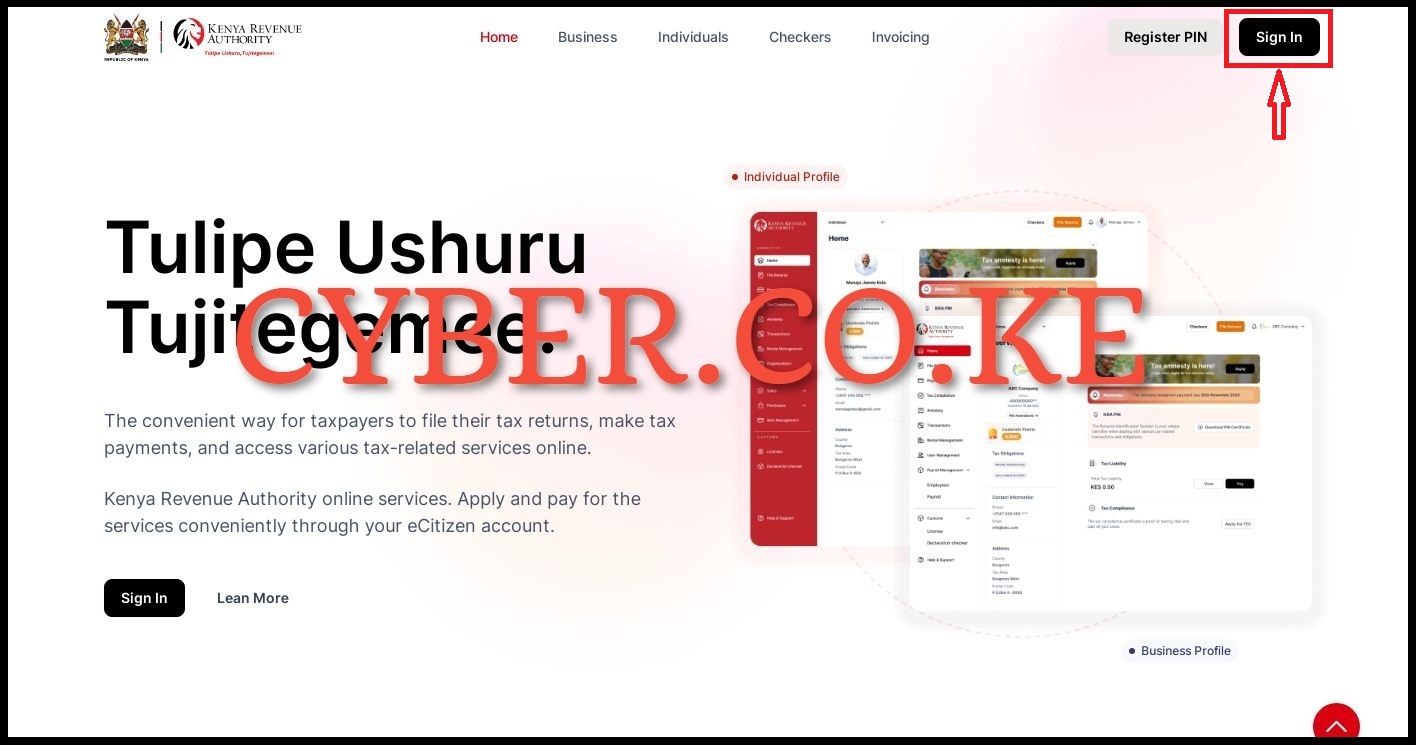
Once you are on https://ecitizen.kra.go.ke/ click on the “Sign In” button as it is the fastest way to access the account. This is only possible when you already have an existing eCitizen account that you want to use to apply for KRA PIN Number online.
Step 3: Login Into eCitizen
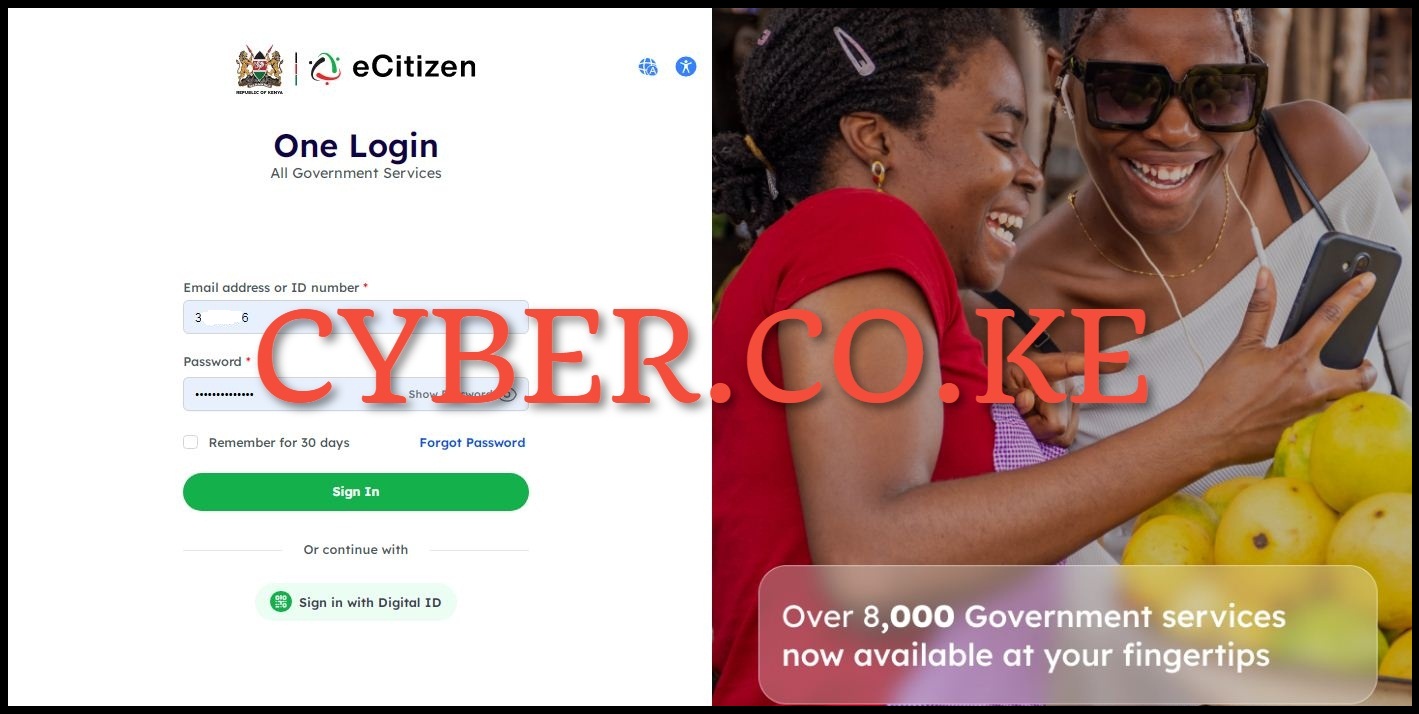
Next on the eCitizen login page, you need to enter either your email address or ID Number followed by your eCitizen account password. Thereafter, click on the “Sign In” button.
Step 4: eCitizen Account OTP Verification
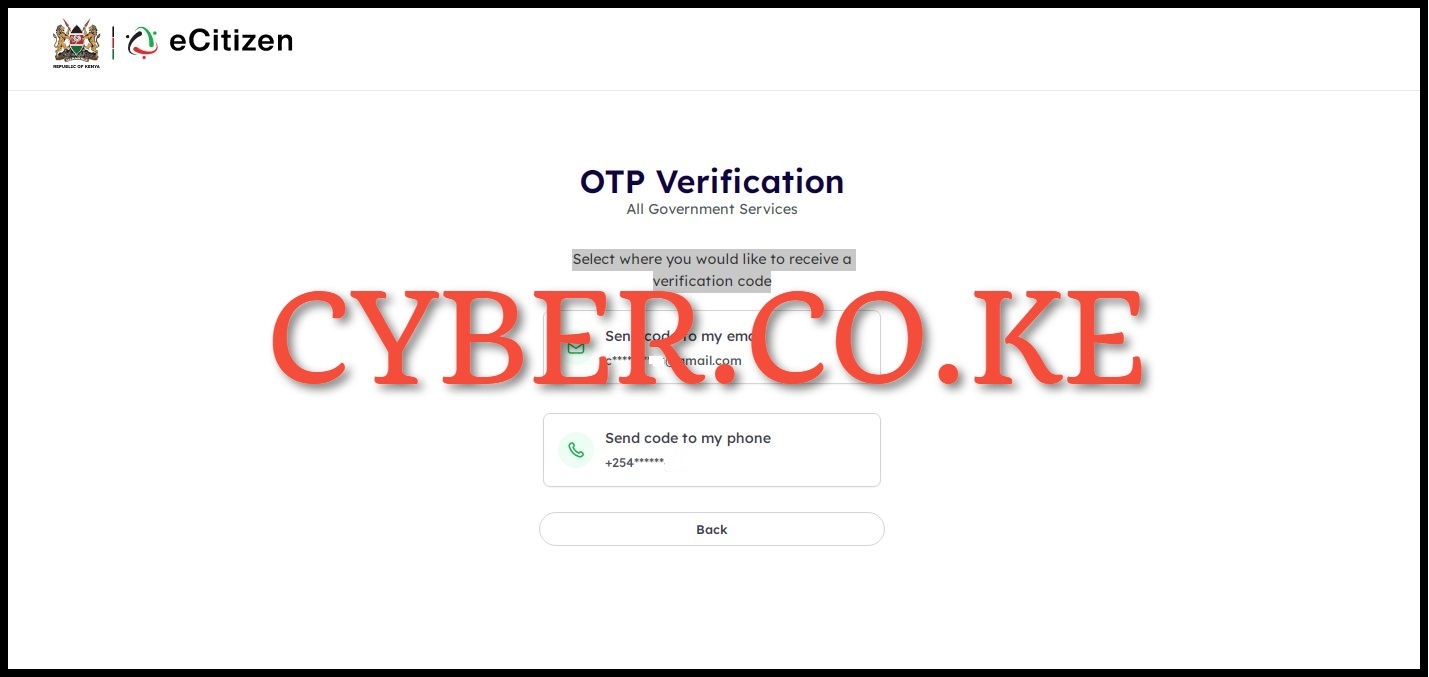
In this step, you need to select where you would like to receive the eCitizen account verification code (OTP). You can choose either Email Address or Phone Number depending on what suits you better. In this blog post, we have chosen “Send code to my email address” as an option of getting the eCitizen OTP Verification code.
Step 5: Enter eCitizen Account OTP Verification
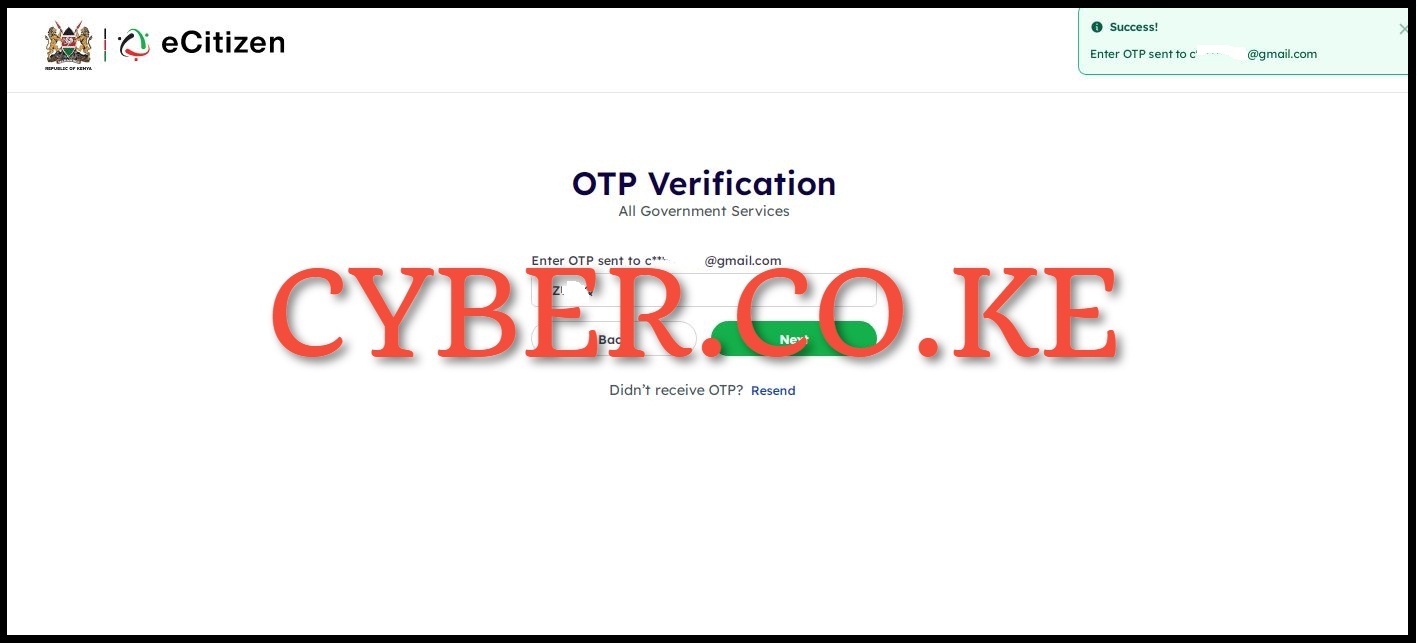
Next you need to check your email address or phone number for the eCitizen Account OTP code. Enter the eCitizen account verification code and click on the “Next” button.
Step 6: Oauth Consent Screen
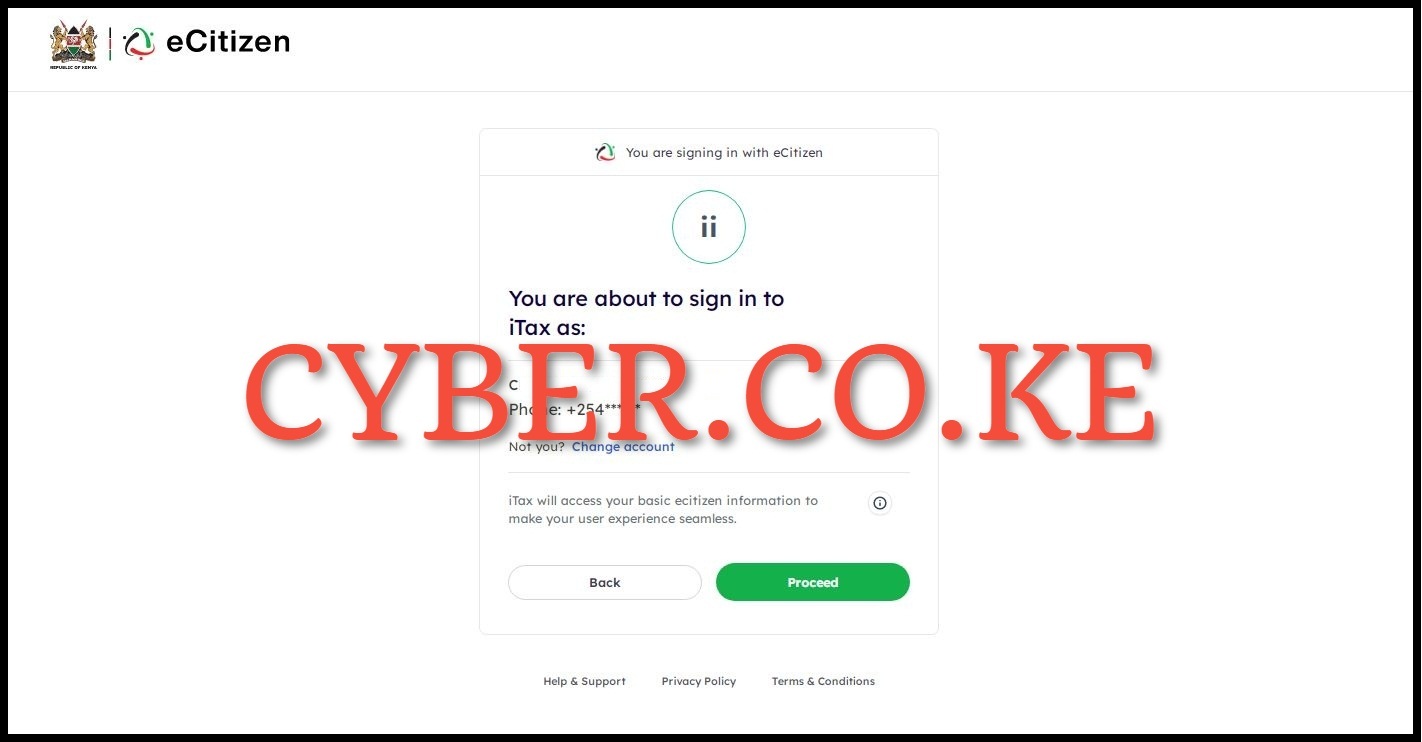
Once you have entered the eCitizen account OTP verification code, the next step is the “Oauth Consent Screen” which enables iTax to access your basic eCitizen information to make your user experience seamless. Click on the “Proceed” button to begin the process of applying for KRA PIN Number using eCitizen account.
Step 7: You don’t have a KRA PIN
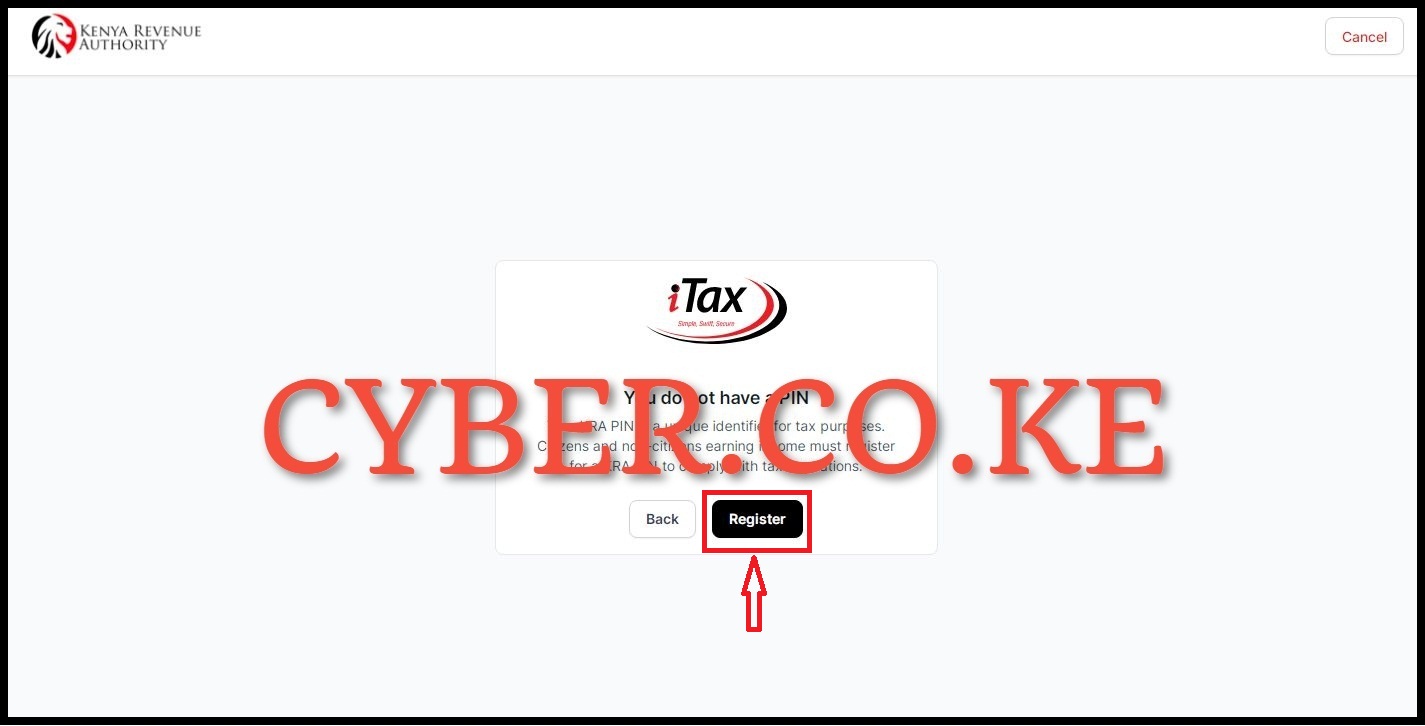
In this step, you will see a message window on the url: “https://ecitizen.kra.go.ke/individual/pin-registration/no-pin” telling you that you don’t have a KRA PIN Number. Your KRA PIN is a unique identifier for tax purposes. Citizens and non-citizens earning income must register for a KRA PIN to comply with tax regulations. Click on the “Register” button to begin the process of applying for a new KRA PIN using eCitizen account.
Step 8: Enter Basic Information
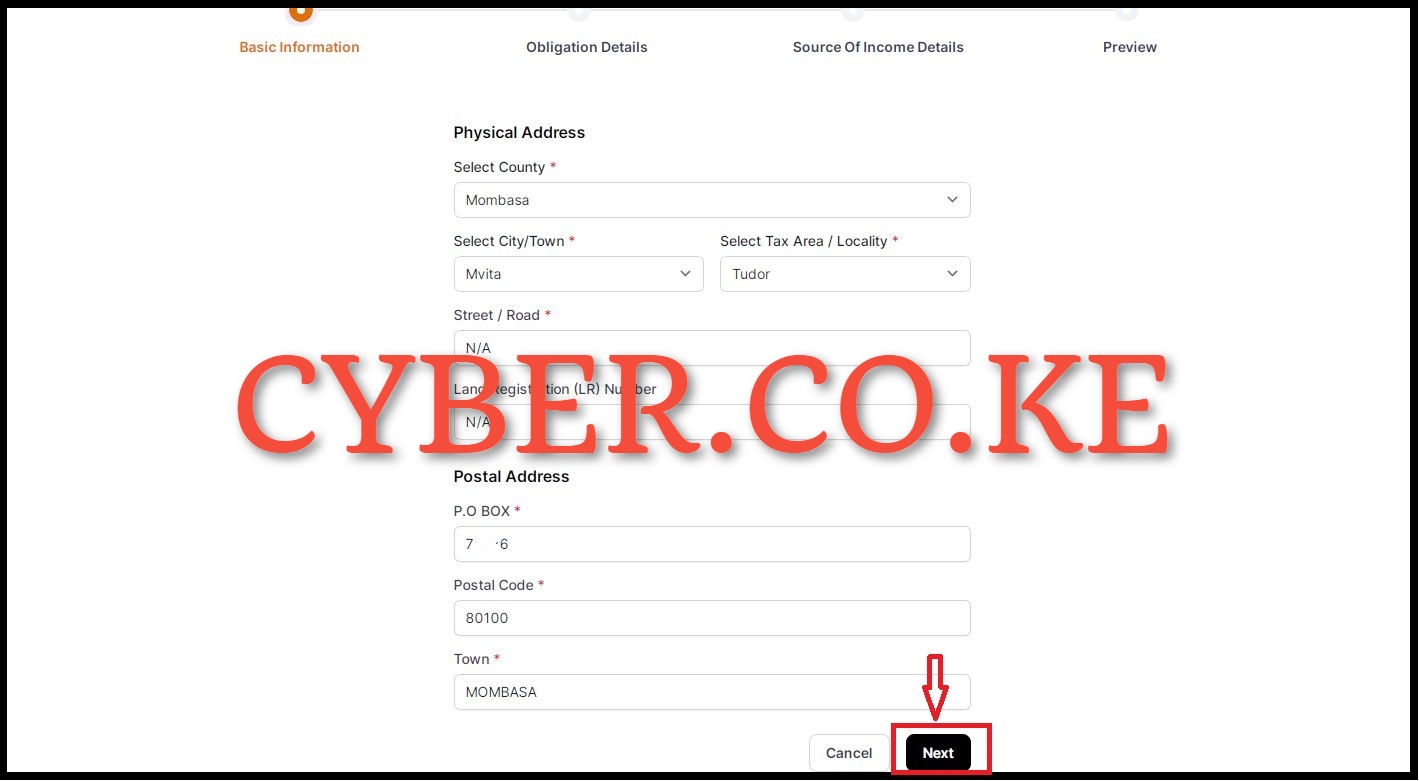
The process of applying for KRA PIN using eCitizen begins by first entering the basic information that includes: Select County, Select City/Town, Select Tax Area/Locality, Street/Road, Land Registration (LR) Number and Postal Address. Once you have filled in the basic information, click on the “Next” button.
Step 9: Additional Information
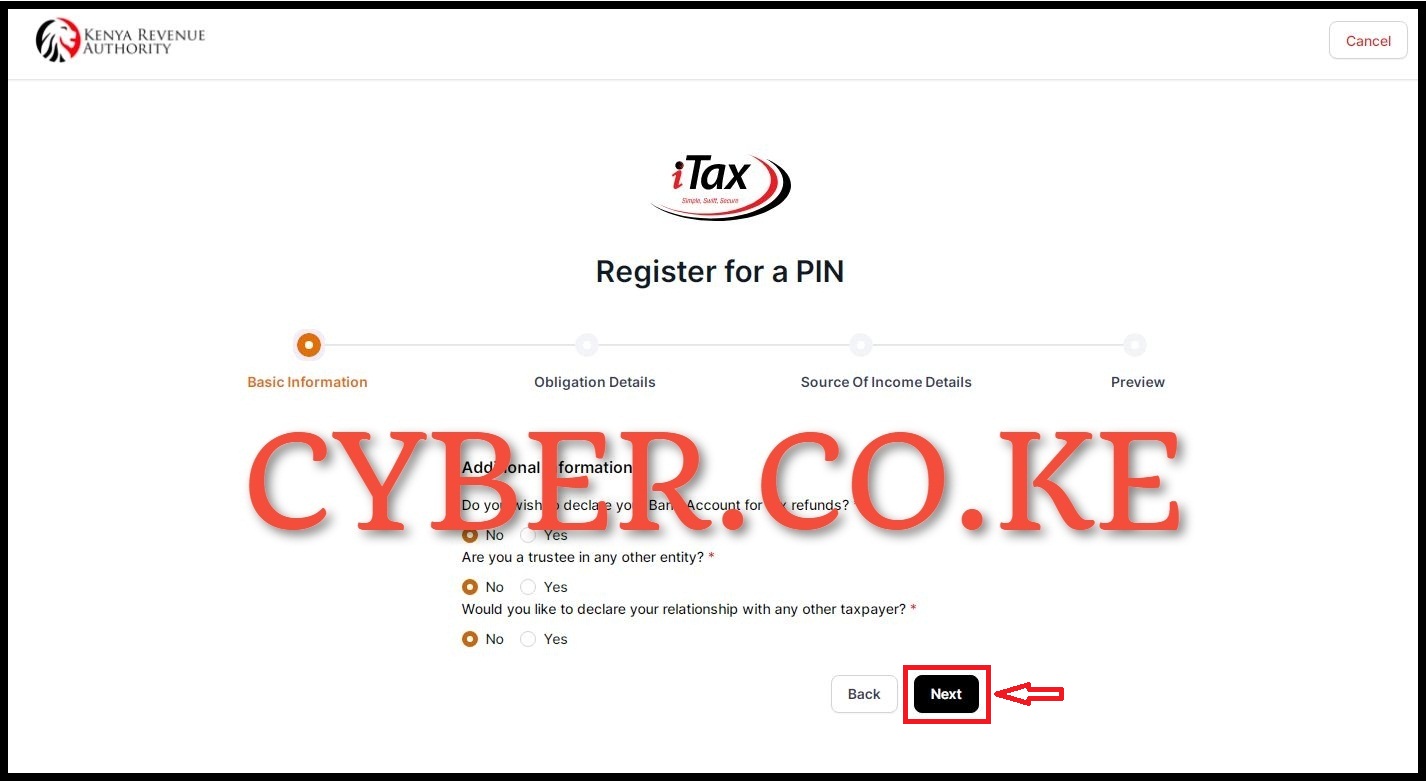
This is a continuation of the Basic information. It is comprised of 3 questions: 1. Do you wish to declare your Bank Account for tax refunds? 2. Are you a trustee in any other entity? and 3. Would you like to declare your relationship with any other taxpayer? The answer you choose is either “Yes” or “No” and then click on the “Next” button.
Step 10: Obligation Details
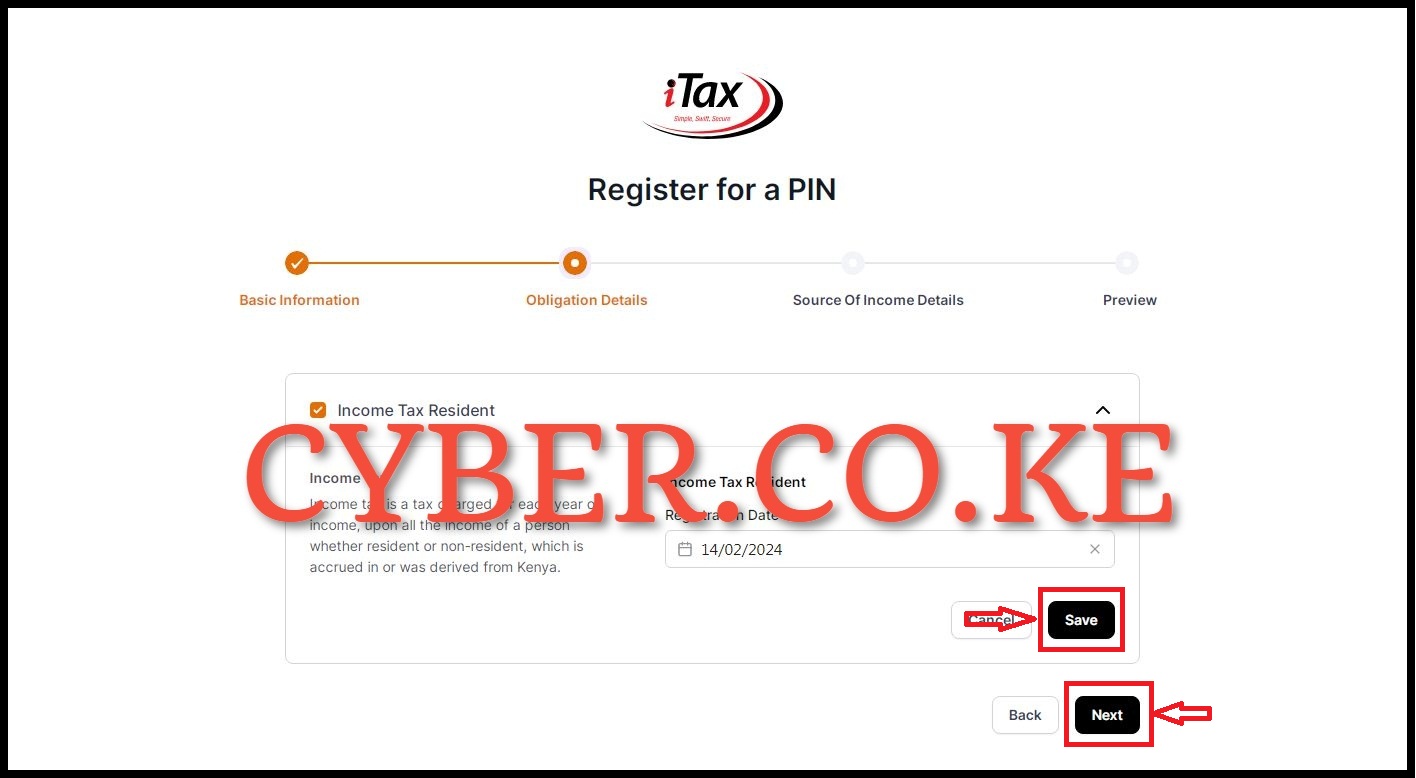
Not much to do in this step as all Kenyans by default the tax obligation selected is “Income Tax Resident” i.e. Income tax is a tax charged for each year of income, upon all the income of a person whether resident or non-resident, which is accrued in or was derived from Kenya. The registration date is pre-filled with the current date that you are applying the KRA PIN on eCitizen. Click on “Save” button then click on the “Next” button.
Step 11: Source Of Income Details
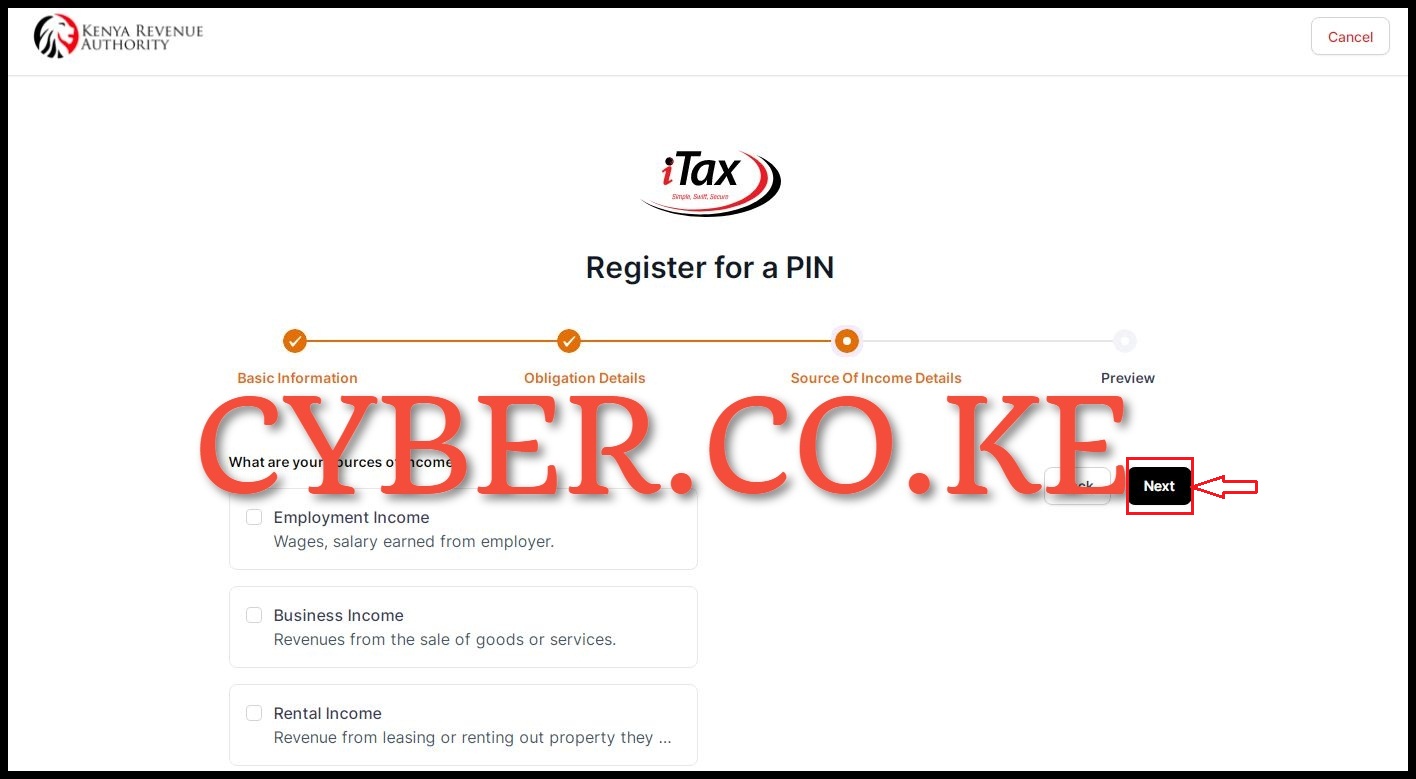
In this step, you need to select your source of income from either: 1. Employment Income, 2. Business Income or 3. Rental Income. If you don’t have any source of income, you just need to click on the “Next” button to move to the next step.
Step 12: Preview, Confirm Details and Submit
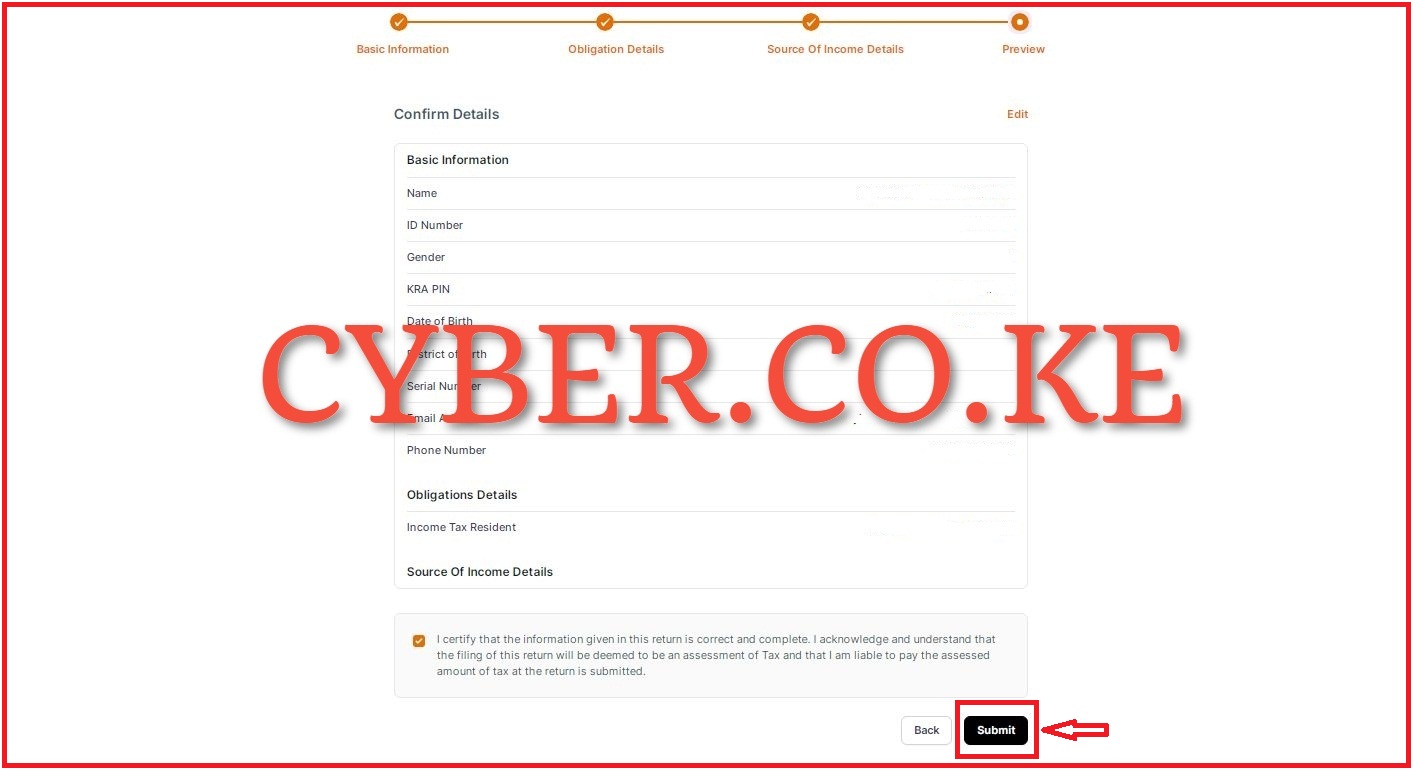
This step involves first previewing the details that you have filled on the KRA PIN Application form on eCitizen account. You need to ensure that you confirm the details before submitting. Afterwards, tick on the check box with “I certify that the information given in this return is correct and complete. I acknowledge and understand that the filing of this return will be deemed to be an assessment of Tax and that I am liable to pay the assessed amount of tax at the return is submitted.” Once you have confirmed the details on the form, click on the “Submit” button.
Step 13: OTP Verification
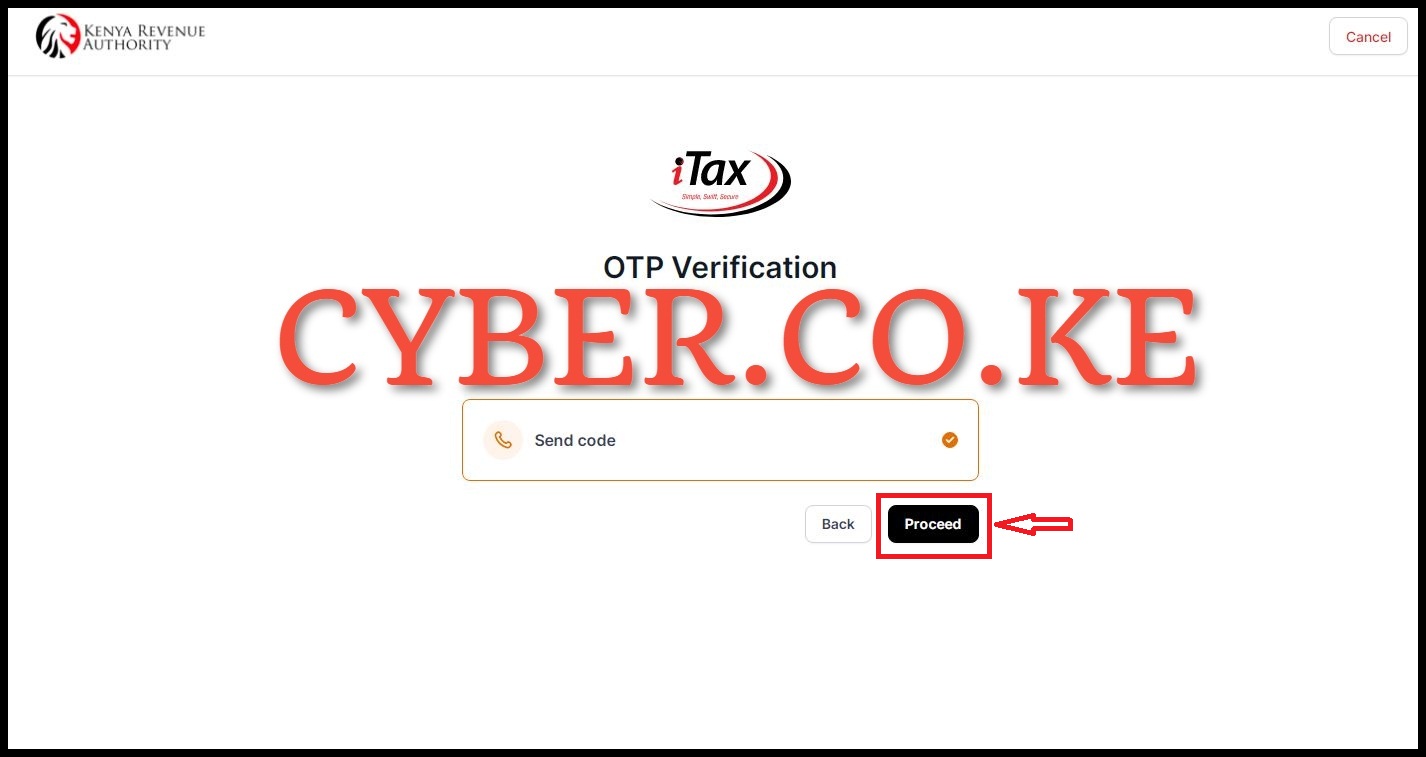
The last step involved requesting and entering the KRA eCitizen Notification code that will be sent to both Phone Number and Email Address that are in your eCitizen account. You need to click on the “Proceed” button to receive the OTP verification code.
Step 14: Enter OTP Sent
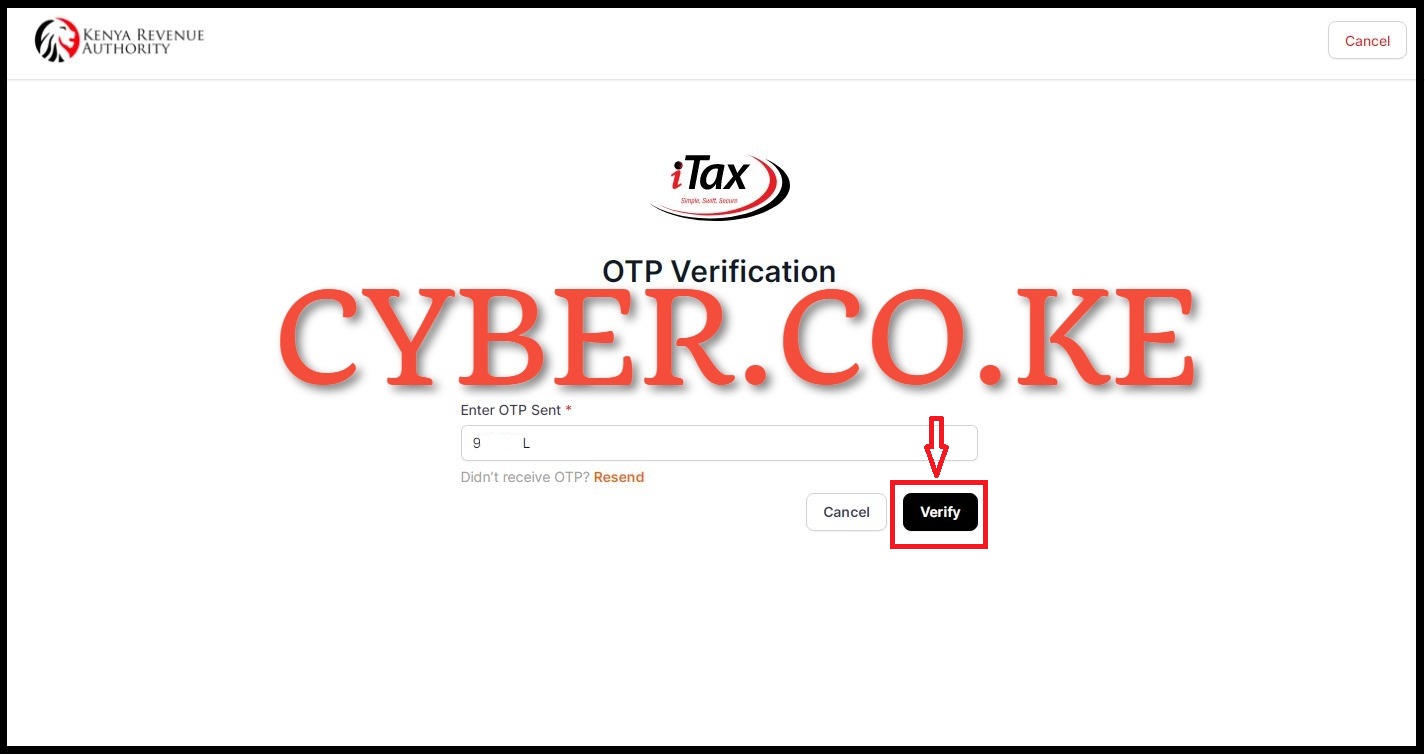
In this step, you need to enter the OTP sent to both your phone number and email address. Once you have entered the OTP Verification code, click on the “Verify” button. You will get a message that taxpayer has been registered successfully using eCitizen.
READ ALSO: Step-by-Step Process of Resetting eCitizen Account Password
The above steps sums up the process that one needs to follow when he or she want to apply or register for a new KRA PIN Number using eCitizen account. Even though applying for KRA PIN using eCitizen is still in the early phases you might experience some small glitches during the application process. But also remember that you can still use iTax to register for a new KRA PIN Number at a much quicker rate.
TRENDING BLOG POSTS IN KENYA
CYBER.CO.KE
How To Download KRA PIN Certificate Online (In 5 Steps)
How To File KRA Nil Returns For Students On iTax (KRA Portal)
How To File KRA Nil Returns For Unemployed On iTax (KRA Portal)
CLICK HERE TO REGISTER KRA PIN NUMBER
How To Check If You Have Filed KRA Returns (In 4 Steps)
How To Change or Reset iTax Password Online (In 7 Steps)
How To Change or Reset KRA Password Online (In 7 Steps)
CLICK HERE TO RETRIEVE KRA PIN CERTIFICATE
How To Change Email Address Registered On iTax (KRA Portal)
How To Apply For Tax Compliance Certificate On iTax (KRA Portal)
How To Download Tax Compliance Certificate On iTax (KRA Portal)
CLICK HERE TO UPDATE KRA PIN NUMBER
How To Generate KRA Payment Slip On iTax (KRA Portal)
How To Download KRA Returns Receipt Online (In 5 Steps)
How To Check Your KRA PIN Using KRA PIN Checker (iTax PIN Checker)
CLICK HERE TO CHANGE KRA PIN EMAIL ADDRESS

