eTIMS Lite offers a streamlined, web-based solution accessible through eCitizen, catering specifically to businesses with minimal transaction volumes in Kenya. Designed for simplicity and accessibility, this eTIMS Lite provides a user-friendly interface for managing essential tax-related tasks such as Invoicing via eCitizen account. With eTIMS Lite emphasis being on ease of use, eTIMS Lite enables individuals, businesses and companies (all Non VAT Taxpayers) to efficiently navigate tax compliance processes without the complexity typically associated with larger-scale operations. By leveraging the convenience of web accessibility and integration with eCitizen, eTIMS Lite solution offers a practical tool for businesses seeking a straightforward approach to issuing Tax Invoices quickly and easily.
READ ALSO: How To Register for eTIMS Lite (Web Based Solution)
To be able to onboard on eTIMS Lite via eCitizen, you need to ensure that you already have an eCitizen account and also have an active KRA PIN Number. To login to your eCitizen account, you need to have your ID Number (email address) and eCitizen account Password. These two form part of the eCitizen account login credentials. In this blog post, I will be sharing with you the main steps that you need to follow so as to successfully onboard on eTIMS Lite via eCitizen account quickly and easily today. As a reminder, onboarding on eTIMS Lite is only for the Non VAT Taxpayers in Kenya.
How To Onboard on eTIMS Lite via eCitizen
The following are the 10 main steps involved in the process of How To Onboard on eTIMS Lite via eCitizen that you need to follow.
Step 1: Visit ecitizen.kra.go.ke
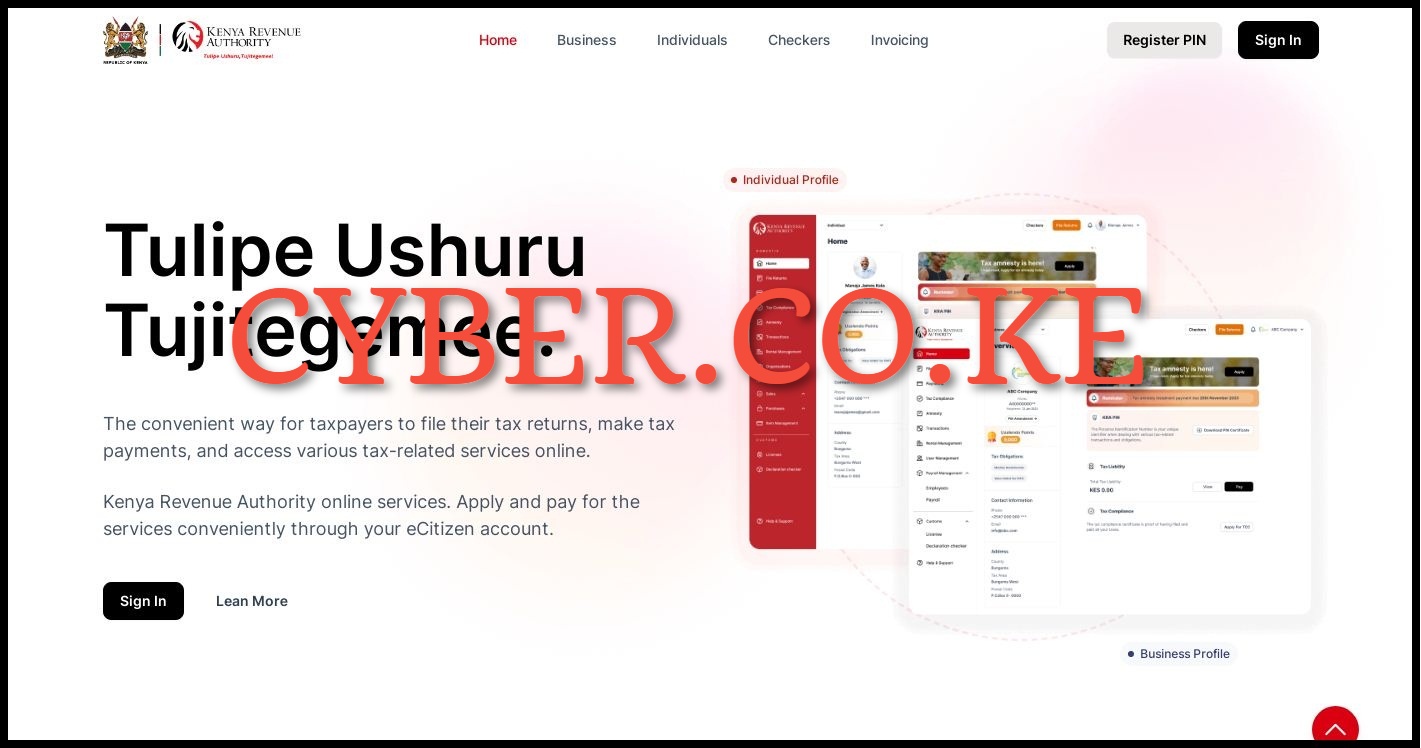
The first and foremost step in the process of onboarding on eTIMS Lite via eCitizen is to visit https://ecitizen.kra.go.ke/
Step 2: Click on the Sign In button
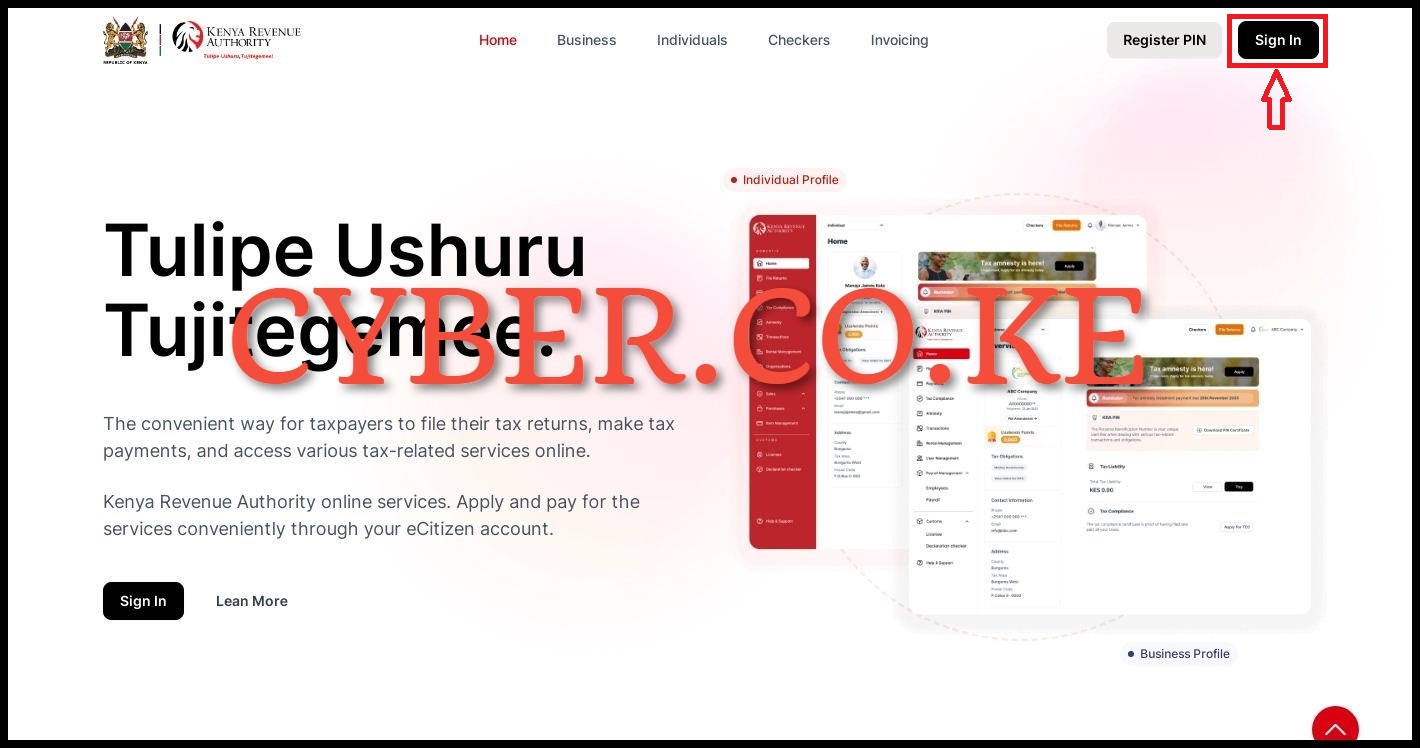
Next, once you are on https://ecitizen.kra.go.ke/, on the top right hand side, click on the “Sign In” button to begin the process of eTIMS Lite onboarding via eCitizen.
Step 3: Login Into eCitizen
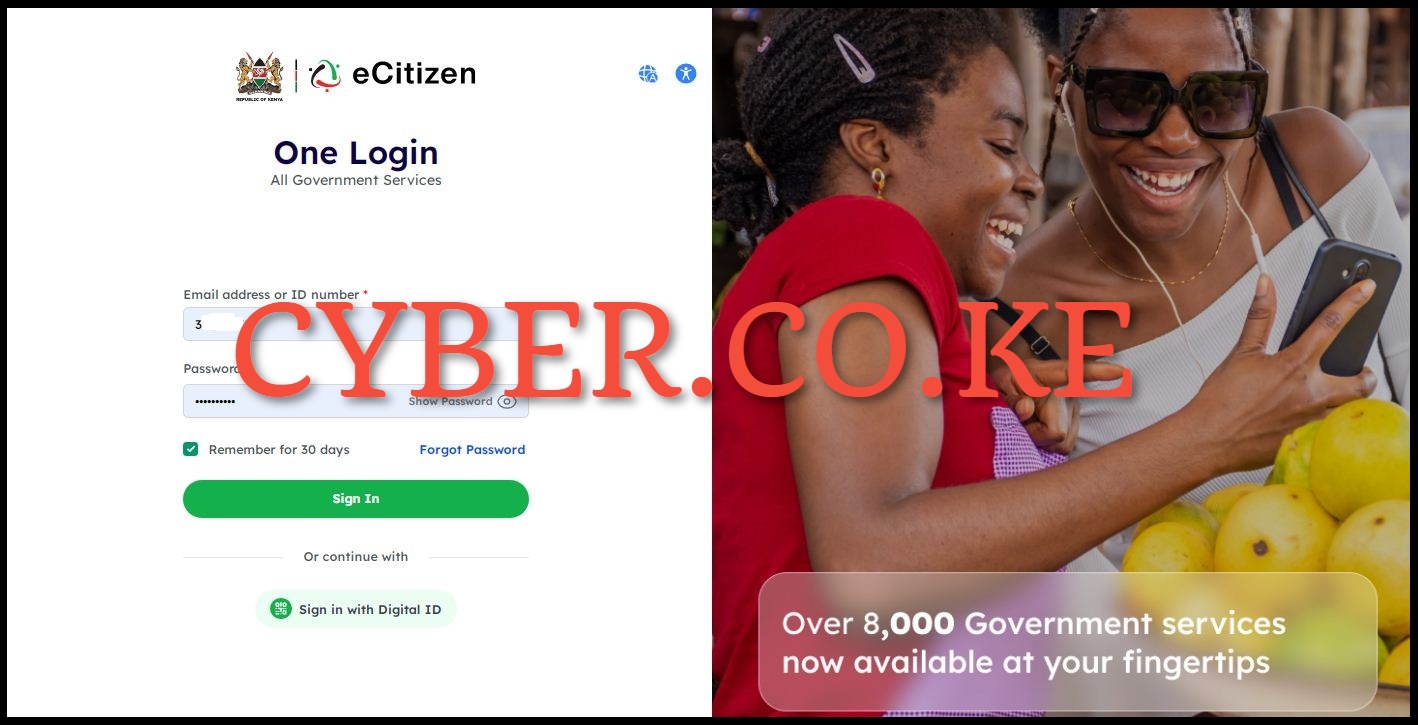
In this step, you need to login into your eCitizen account by entering your National ID Number or Email Address, eCitizen Account password and then proceed to click on the “Sign In” button.
Step 4: OTP Verification
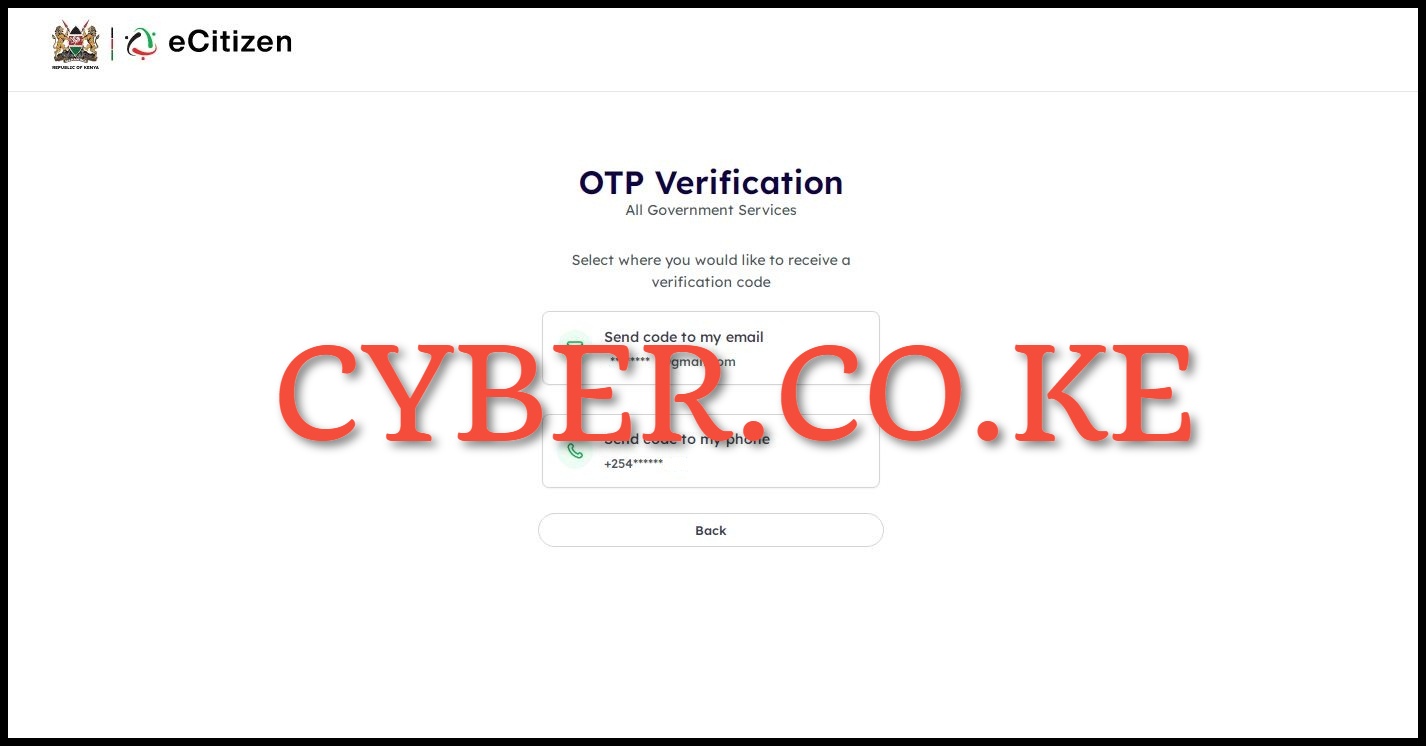
Next, you must choose the OTP Verification method for your eCitizen account. This option is accessible only if you have activated Two-Factor Authentication (2FA) for your eCitizen account. Opt for either receiving the OTP verification code through your email address or mobile phone number.
Step 5: Enter eCitizen OTP Verification Code
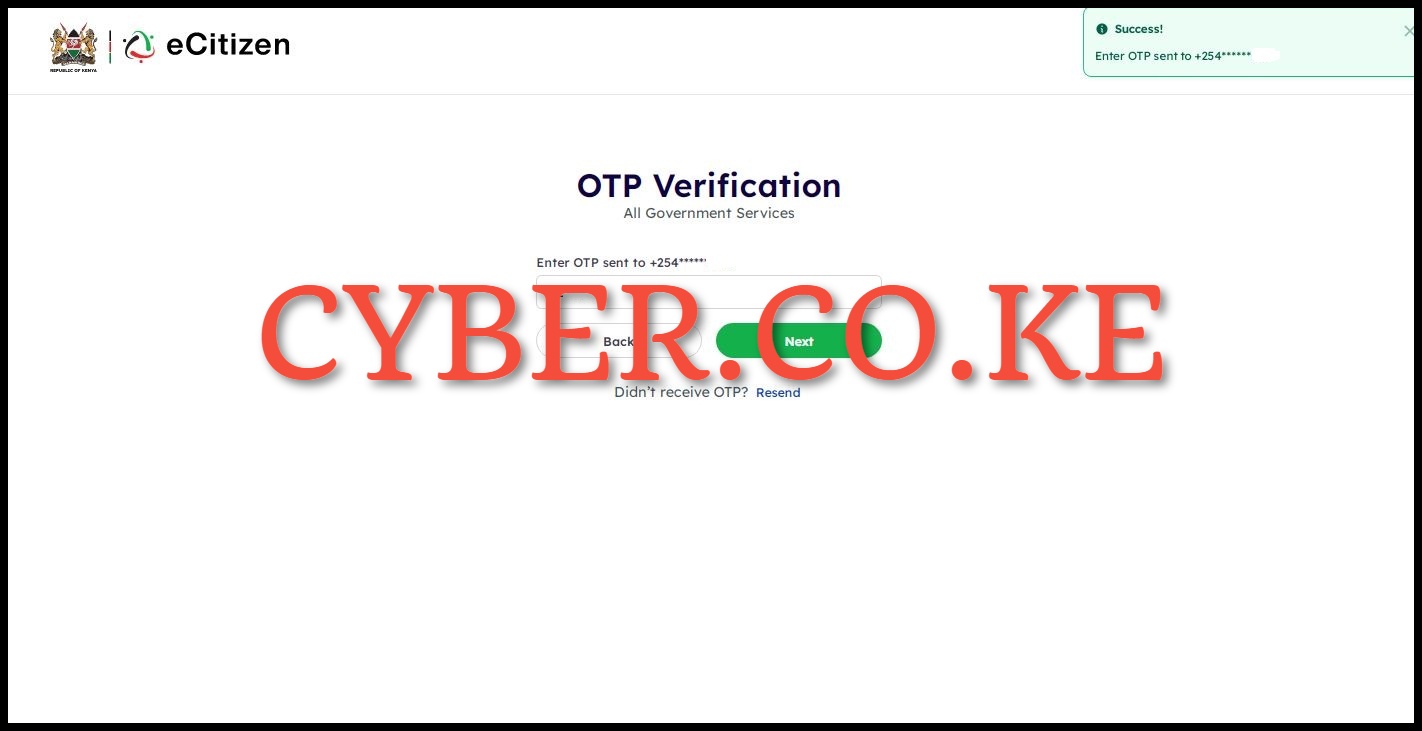
In this step, input the OTP Verification code sent to your email address or phone number. Once you have entered the eCitizen account OTP verification code, click on the “Next” button.
Step 6: Oauth Consent Screen
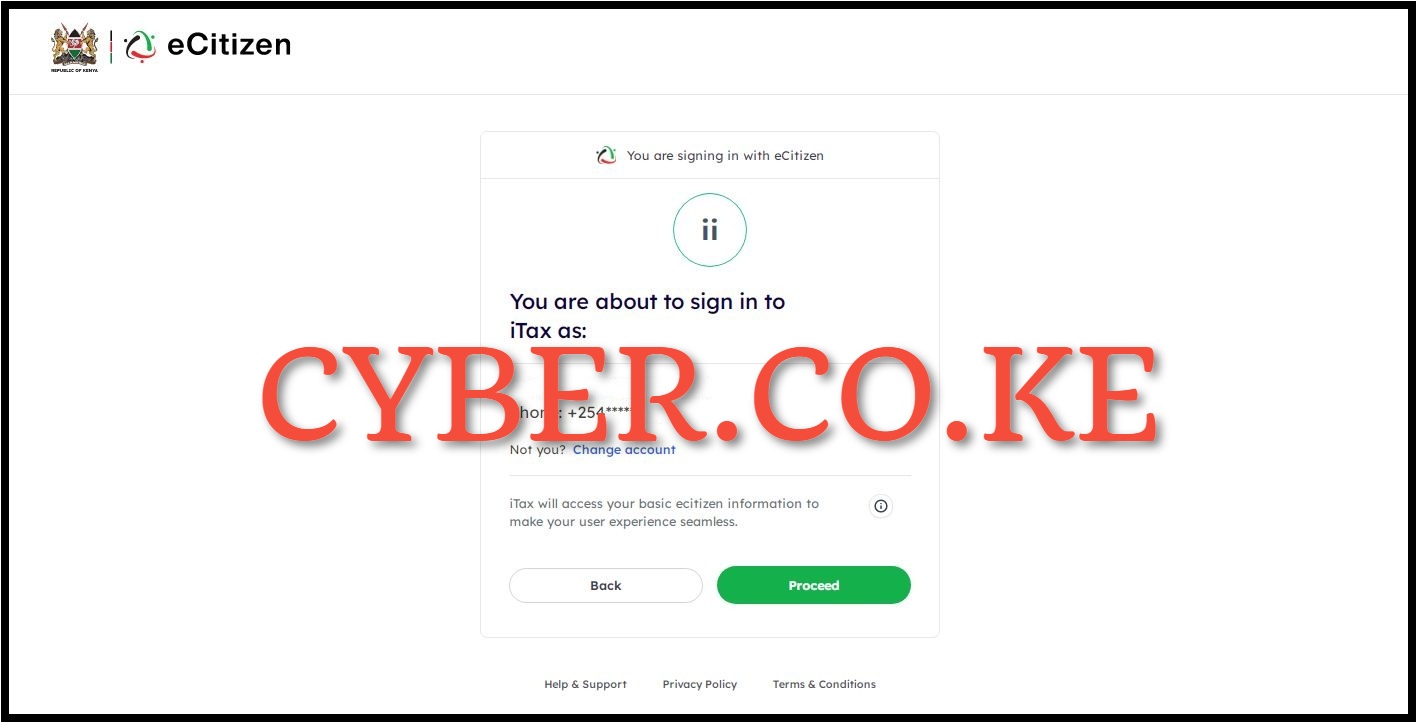
Next, you will encounter the OAuth Consent Screen displaying the message “You are about to sign in to iTax as:” specifying whether you are accessing your eCitizen account as an individual or a business entity, depending on your selection. In our scenario, we are signing in as an individual. Simply click on the “Proceed” button to continue.
Step 7: Account Dashboard
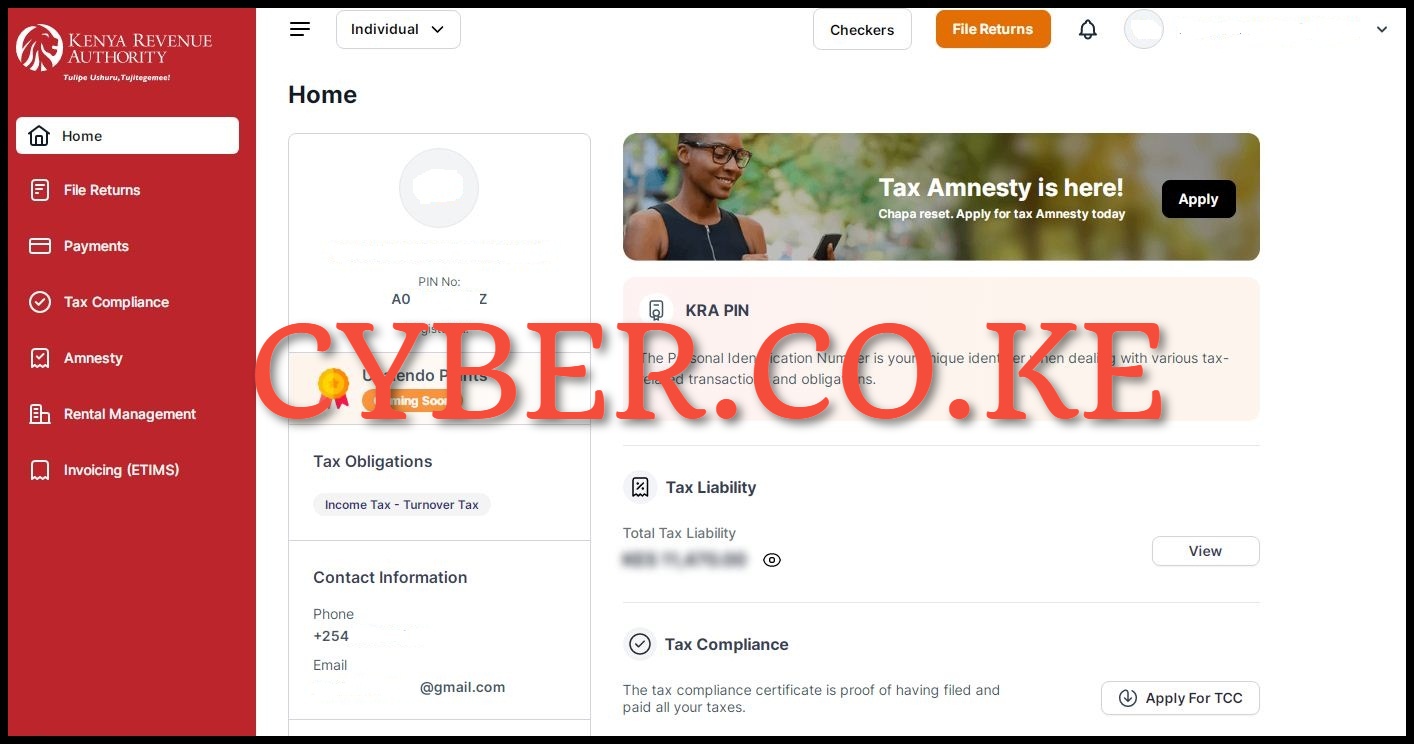
After successfully logging into https://ecitizen.kra.go.ke/, you will be presented with the account dashboard, showcasing a variety of features and functionalities available for taxpayers in Kenya. At this juncture, you can begin the registration process of onboarding on eTIMS Lite via eCitizen.
Step 8: Click on Invoicing (eTIMS)
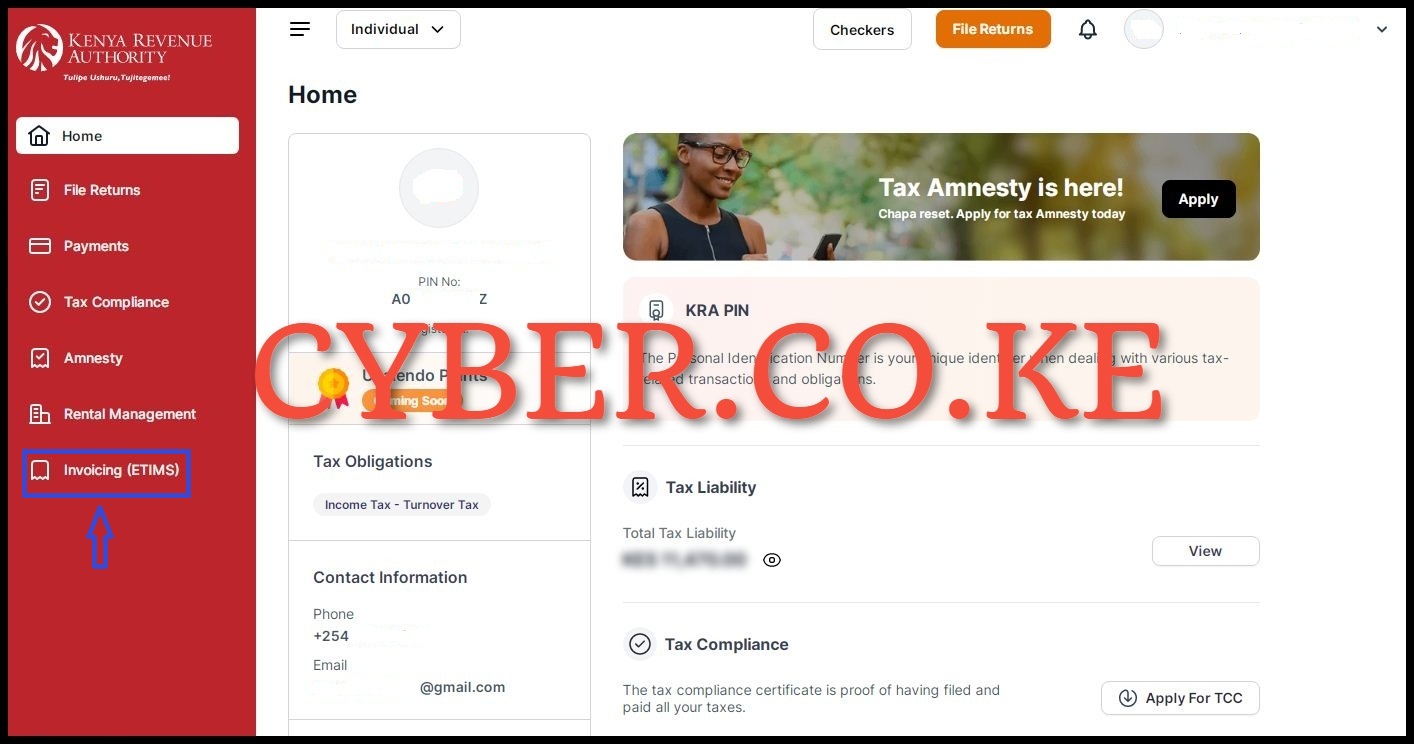
From your account dashboard, click on “Invoicing (eTIMS)” located on the left side menu items panel to start the process of onboarding on eTIMS Lite via eCitizen.
Step 9: Accept eTIMS Lite Terms and Conditions and Privacy Policy
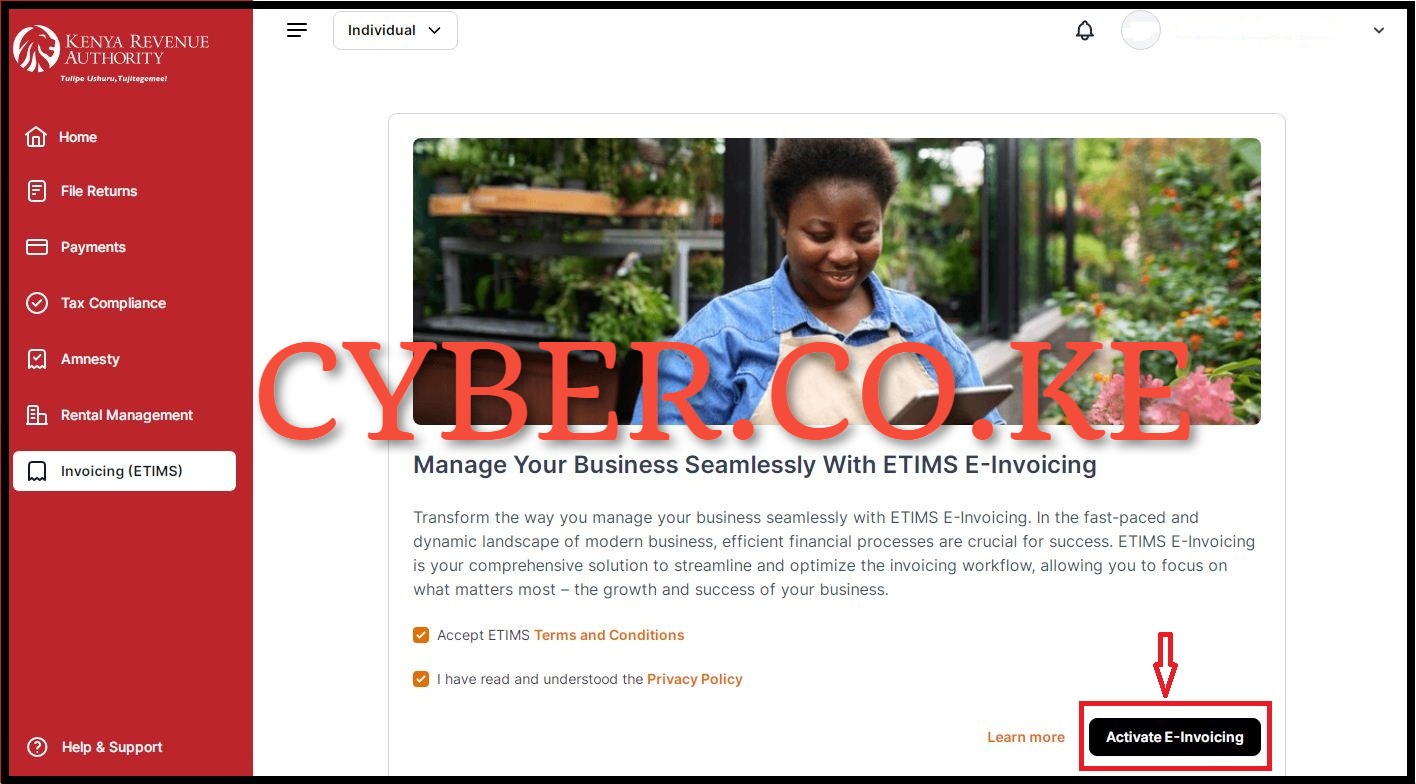
In this step, you need to accept the eTIMS Lite Terms and Conditions and agree to the eTIMS Lite Privacy Policy by ticking on the respective check boxes. After you have done all that, click on the “Activate e-Invoicing” button. This will activate the features of the eTIMS Lite on eCitizen and you can start start generating eTIMS invoices using your eCitizen account quickly and easily. After activating Invoicing via eTIMS Lite, you will the message “Invoicing Successfully Activated” meaning that you have successfully activated Invoicing on eTIMS Lite via your eCitizen account.
Step 10: eTIMS Lite Account Invoicing Dashboard
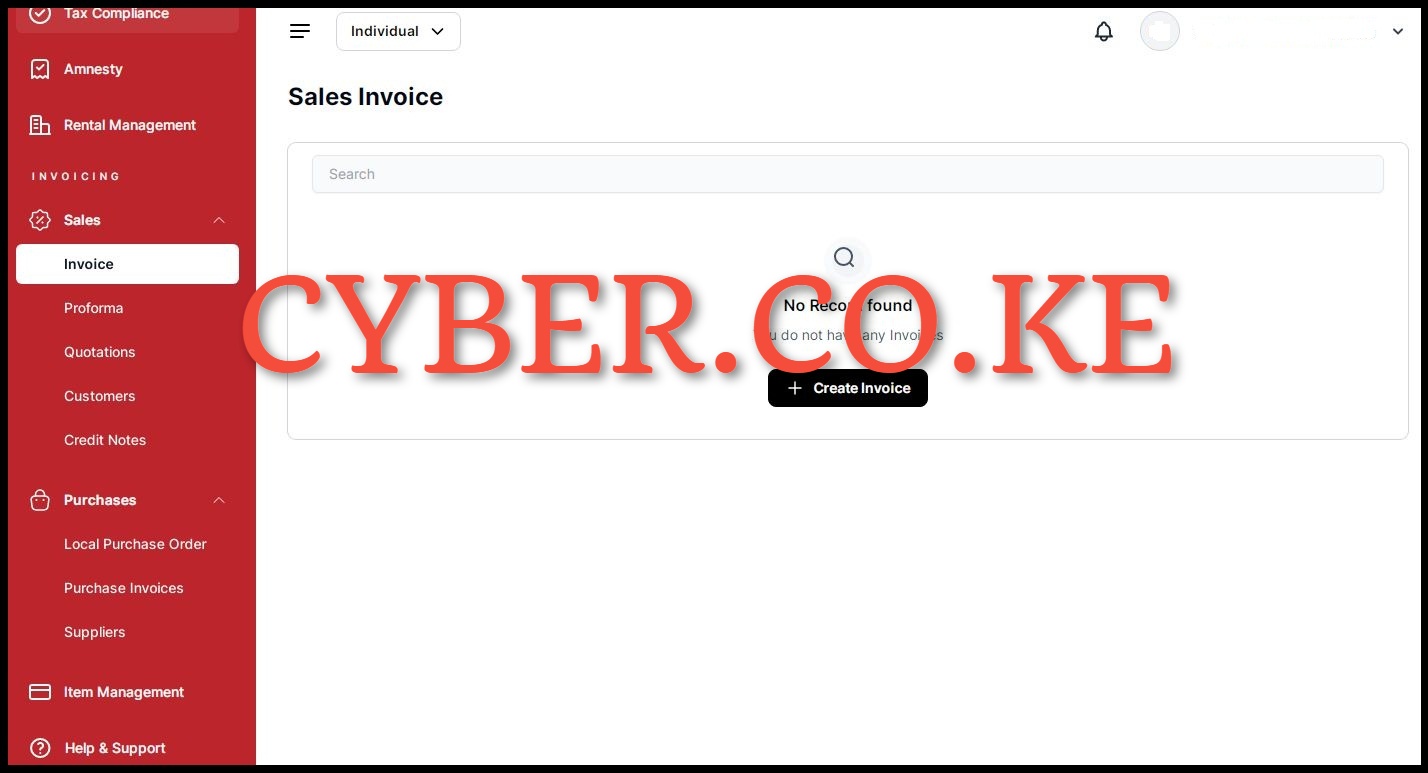
Upon completing the activation of Invoicing on eTIMS Lite via eCitizen, you will be directed to the eTIMS Lite Invoicing Account Dashboard. Within your eTIMS Lite Invoicing account dashboard, you will have access to the following eTIMS Lite features: Sales (Invoices, Proforma, Quotations, Customers, and Credit Notes); Purchases (Local Purchase Orders, Purchase Invoices, and Suppliers) and finally, Items Management. At this point, you can now start generating and issuing eTIMS Invoices to all your customers and remain compliant as required by Kenya Revenue Authority (KRA).
READ ALSO: How To Change eTIMS Password on eTIMS Taxpayer Portal
The process of onboarding on eTIMS Lite is quite simple and straightforward provided that you are already have a KRA PIN Number and an eCitizen account. Since eTIMS Lite resides on the web (https://ecitizen.kra.go.ke/), having an eCitizen account is a must. Also, you need to ensure that you have with you KRA PIN Number that is not registered for VAT as eTIMS Lite only caters for all non VAT registered taxpayers with minimal transactions. You can follow the above listed 10 main steps to successfully onboard on eTIMS Lite via eCitizen quickly and easily today.
TRENDING BLOG POSTS IN KENYA
CYBER.CO.KE
How To Download KRA PIN Certificate Online (In 5 Steps)
How To File KRA Nil Returns For Students On iTax (KRA Portal)
How To File KRA Nil Returns For Unemployed On iTax (KRA Portal)
CLICK HERE TO REGISTER KRA PIN NUMBER
How To Check If You Have Filed KRA Returns (In 4 Steps)
How To Change or Reset iTax Password Online (In 7 Steps)
How To Change or Reset KRA Password Online (In 7 Steps)
CLICK HERE TO RETRIEVE KRA PIN CERTIFICATE
How To Change Email Address Registered On iTax (KRA Portal)
How To Apply For Tax Compliance Certificate On iTax (KRA Portal)
How To Download Tax Compliance Certificate On iTax (KRA Portal)
CLICK HERE TO UPDATE KRA PIN NUMBER
How To Generate KRA Payment Slip On iTax (KRA Portal)
How To Download KRA Returns Receipt Online (In 5 Steps)
How To Check Your KRA PIN Using KRA PIN Checker (iTax PIN Checker)
CLICK HERE TO CHANGE KRA PIN EMAIL ADDRESS

