The eTIMS Lite (Web) is a web based solution accessible through eCitizen. This eTIMS solution type is for businesses with minimal transactions. The eTIMS Lite Web Based Solution is one of the 6 main types of eTIMS that are available to taxpayers in Kenya. You can easily register for the eTIMS Lite Web by using your eCitizen account. You also need to take note that eTIMS Lite (Web) is geared towards Non VAT taxpayers who have minimal transactions. Taxpayers on eTIMS Lite (Web) will be able to issue invoice by using their eCitizen accounts.
READ ALSO: How To Change eTIMS Password on eTIMS Taxpayer Portal
Since eTIMS Lite (Web) resides on eCitizen, the registration process requires that you have with you an eCitizen account. You will need to use your ID Number or Email Address on eCitizen with the combination of your eCitizen account password so as to successfully register for eTIMS Web Based Solution using eCitizen account. In this blog post, I will be sharing the main steps that you need to follow so as to register for eTIMS Lite using eCitizen account quickly and easily.
How To Register for eTIMS Lite
The following are the 10 main steps involved in the process of How To Register for eTIMS Lite that you need to follow.
Step 1: Visit ecitizen.kra.go.ke
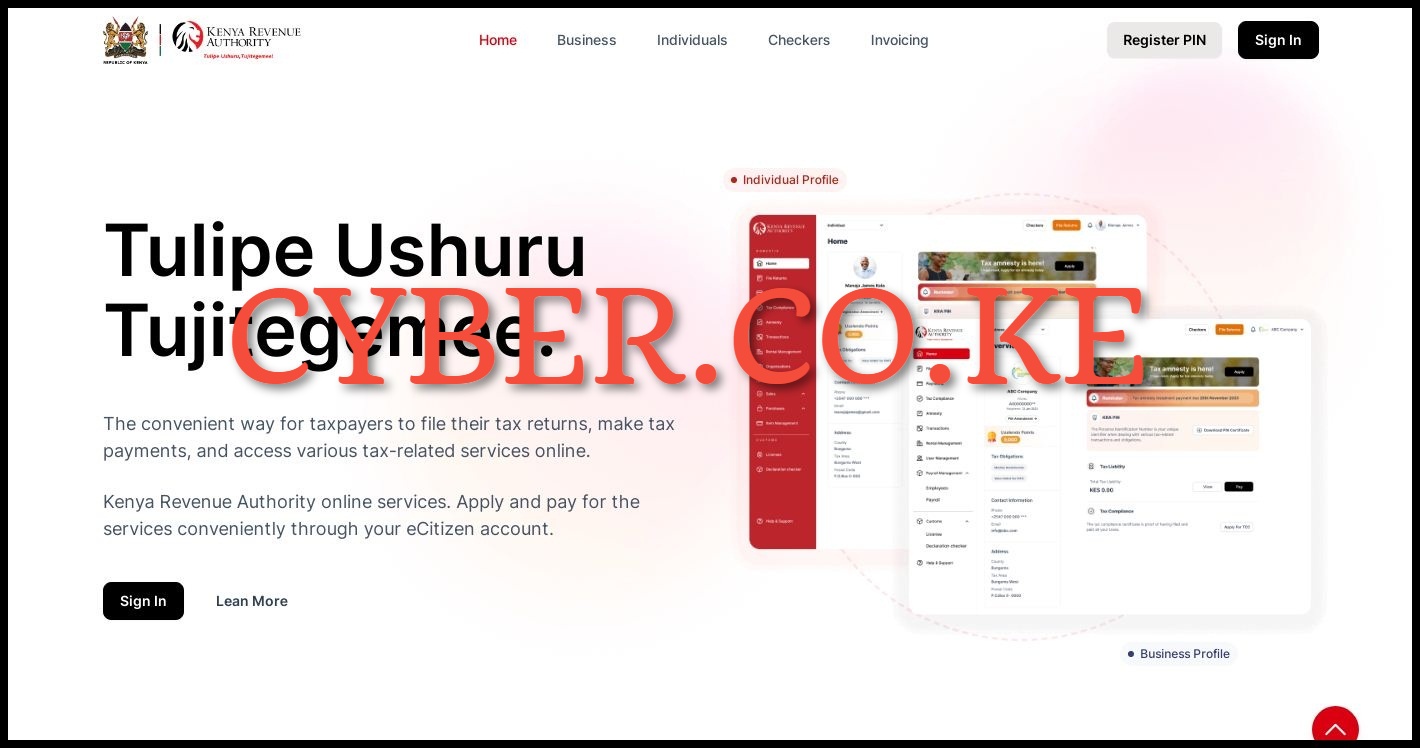
To be able to register for eTIMS Lite (Web) using eCitizen account, you first need to visit https://ecitizen.kra.go.ke/
Step 2: Click on Sign In
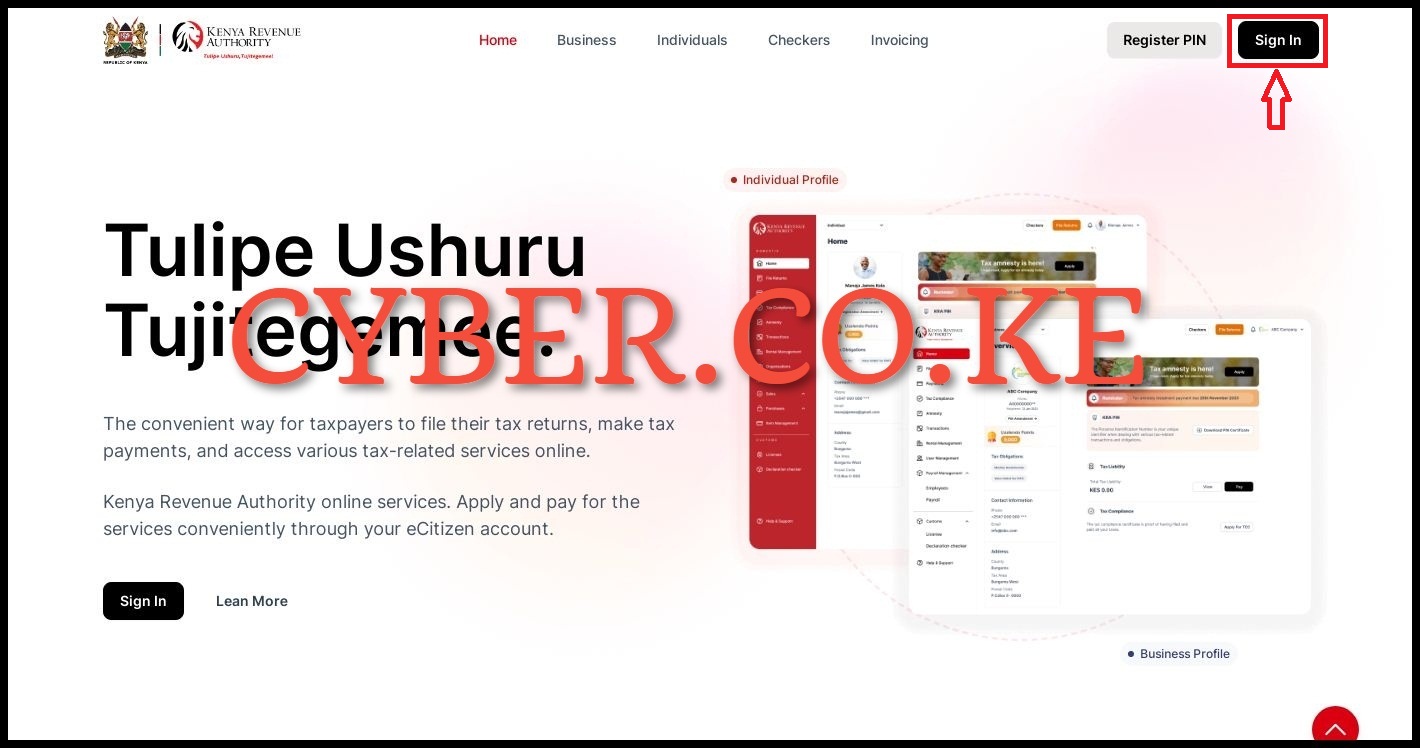
In this step, once you have accessed https://ecitizen.kra.go.ke/ and if you already have an eCitizen account, on the top right corner click on the “Sign In” button.
Step 3: Login Into eCitizen
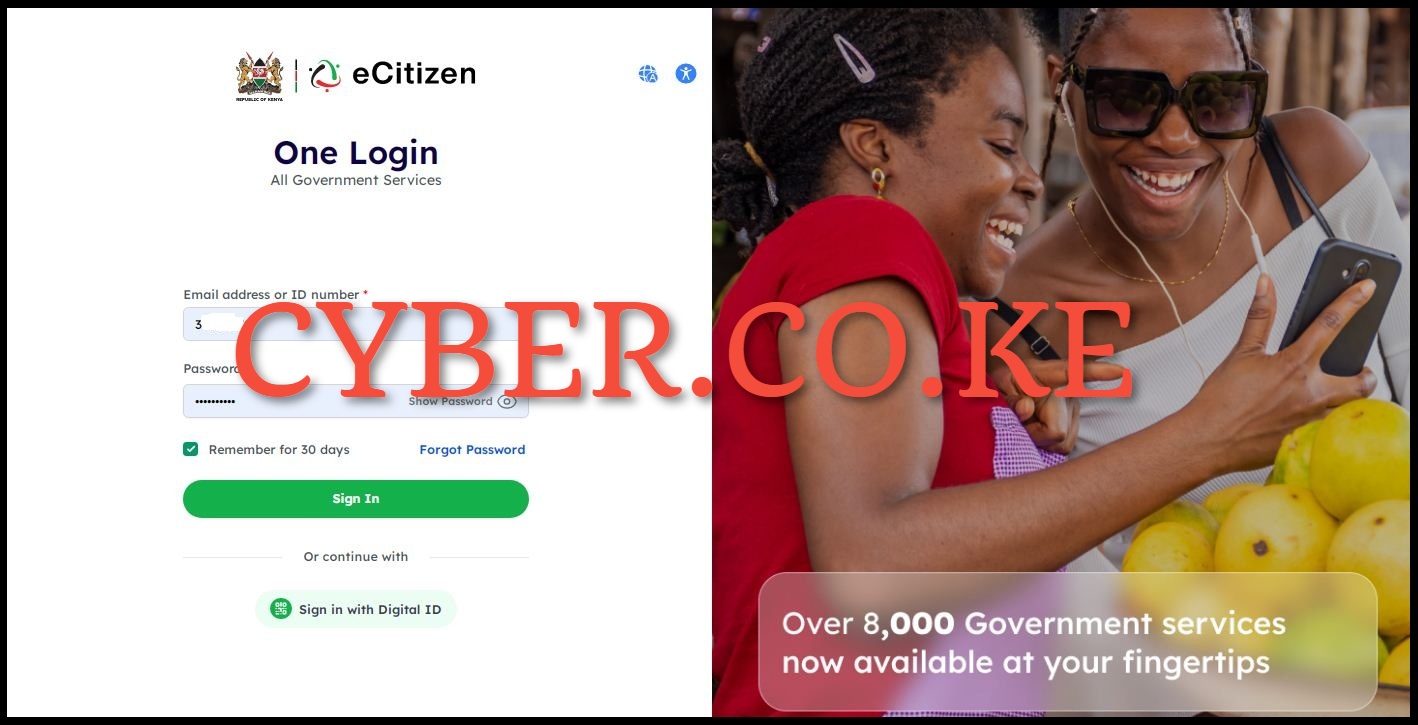
Next, you need to login into your eCitizen account by entering your National ID Number or Email Address, eCitizen Account password and then proceed to click on the “Sign In” button.
Step 4: OTP Verification
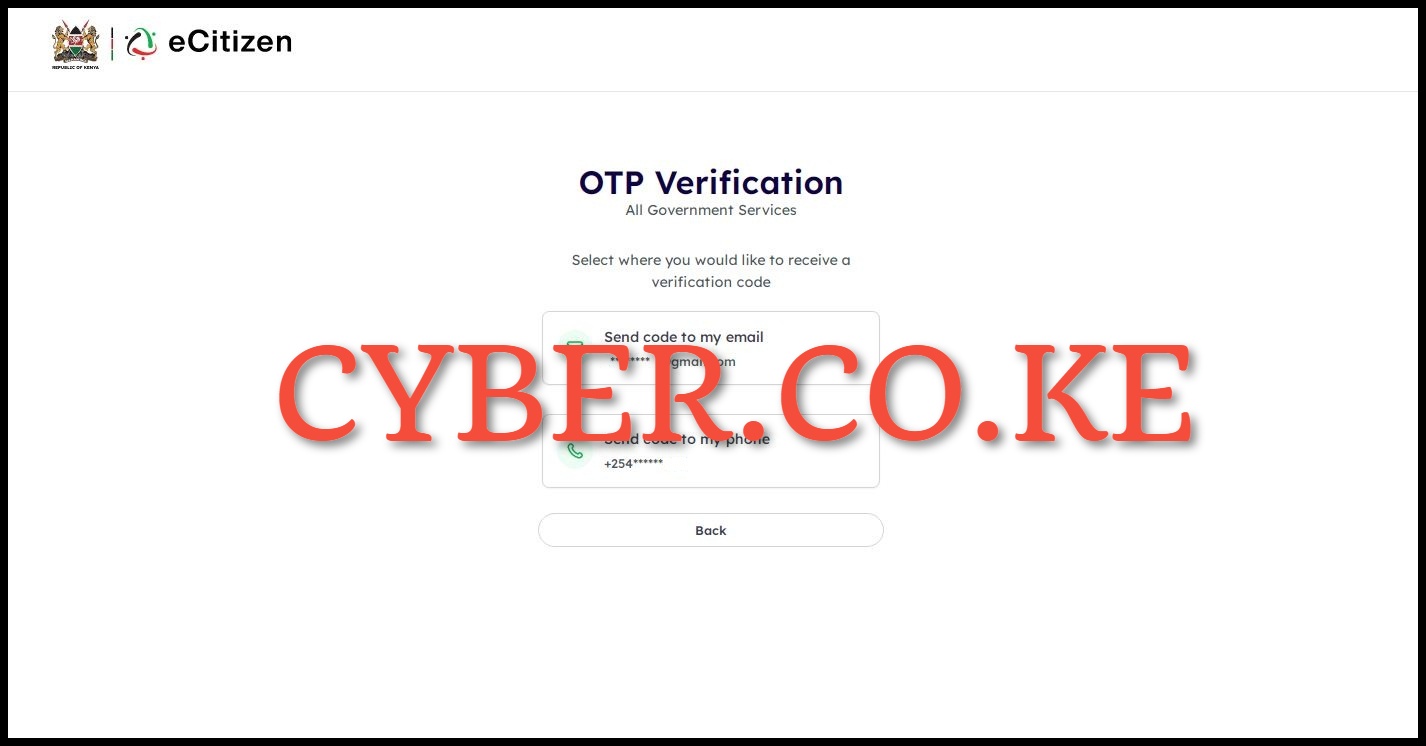
In this step, you will need to select the OTP Verification method for the eCitizen account. This is only available when you have enabled Two-Factor Authentication (2FA) on your eCitizen account. Select a method of receiving the OTP verification code either via email address or phone number (mobile number).
Step 5: Enter OTP Verification Code
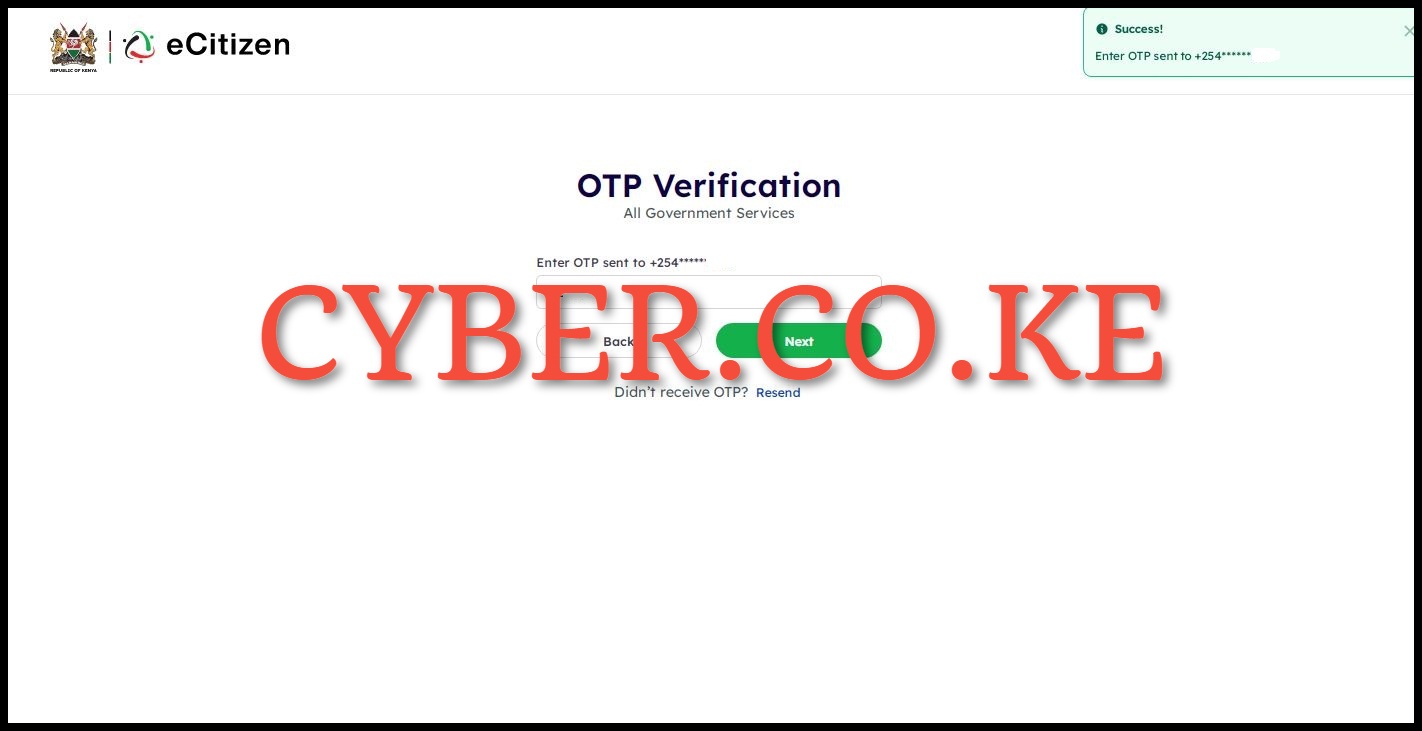
Next, enter the OTP Verification code that was sent to your email address or phone number. Once you have entered the eCitizen account OTP verification code, click on the “Next” button.
Step 6: Oauth Consent Screen
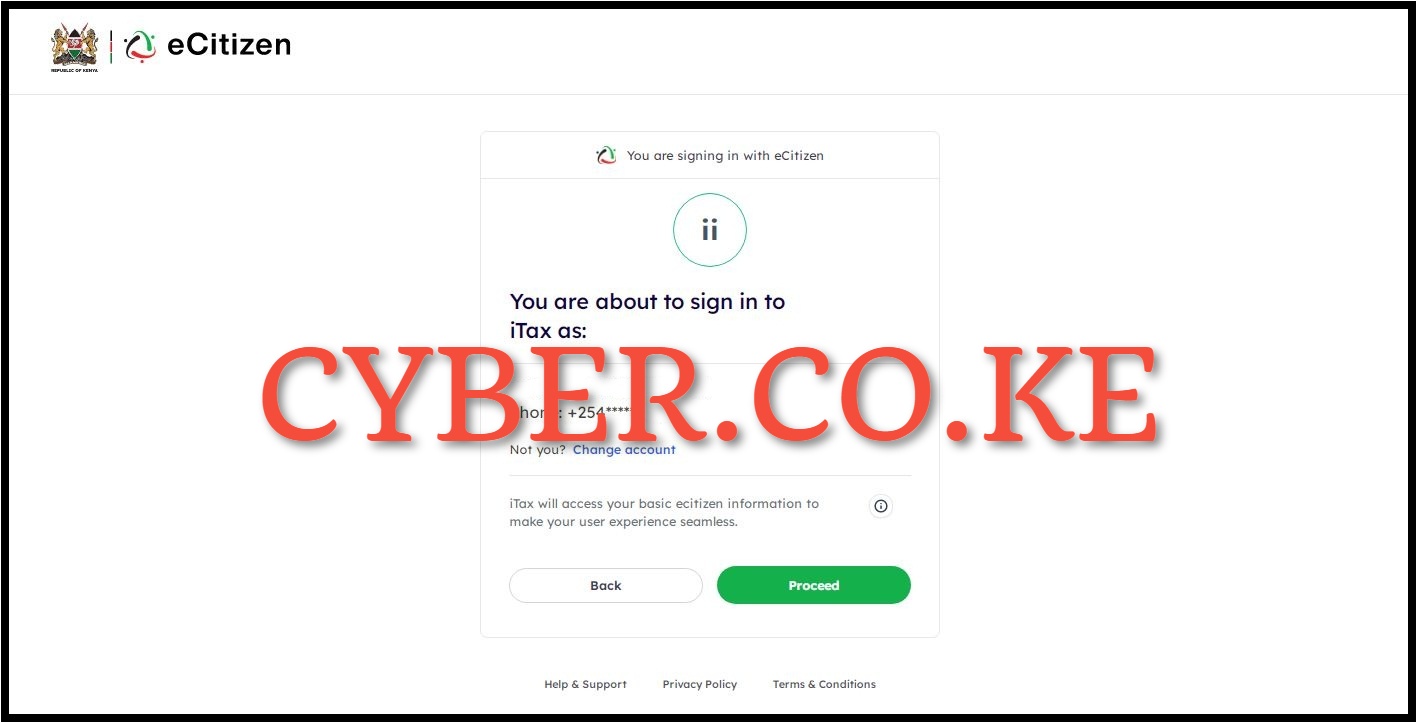
In this step, you will see the Oauth Consent Screen telling you “You are about to sign in to iTax as:” an individual or business depending on which one you select. In our case, we are signing in as an individual. Click on the “Proceed” button.
Step 7: Account Dashboard
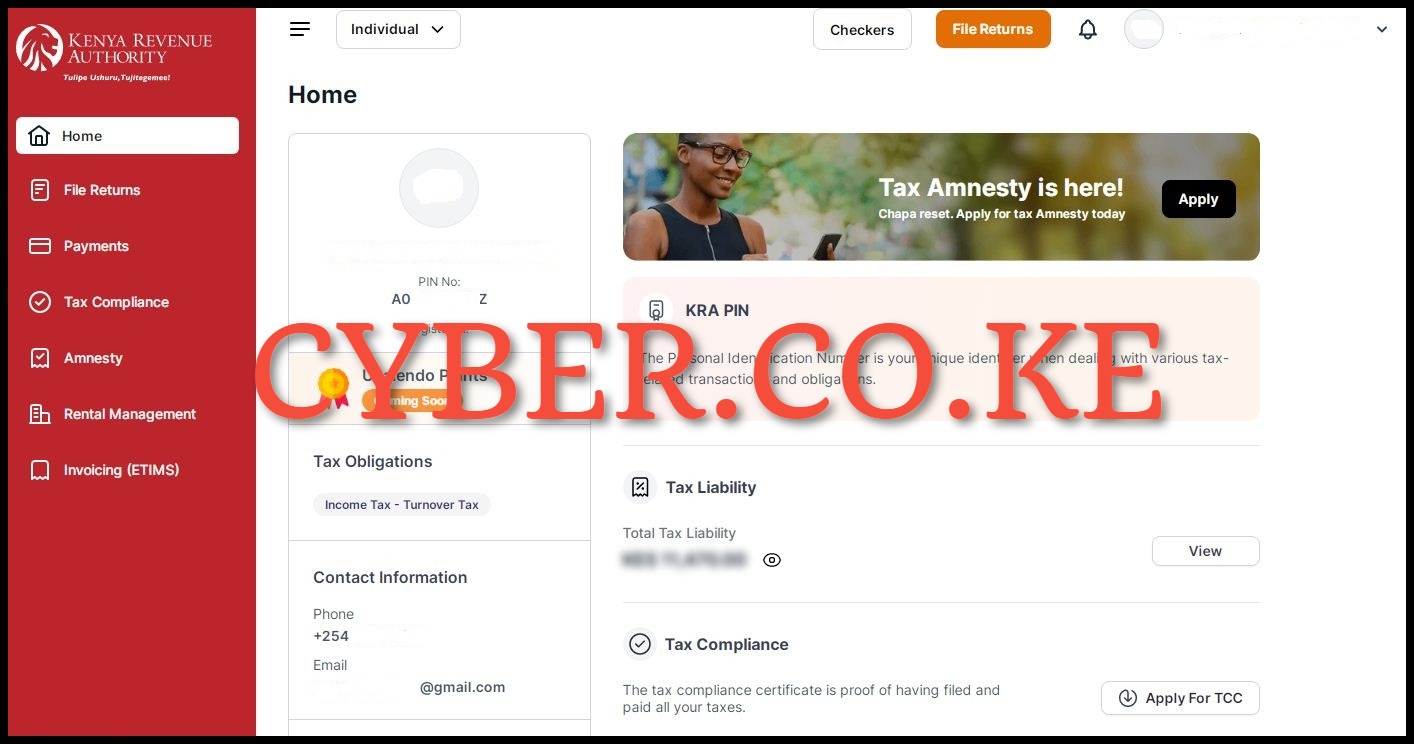
Next, after logging into https://ecitizen.kra.go.ke/ successfully, you will see the account dashboard with a myriad of features and functionalities that taxpayers in Kenya can use. At this point, you can now start the process of registering for eTIMS Lite (Web) using your eCitizen account.
Step 8: Click on Invoicing (eTIMS)
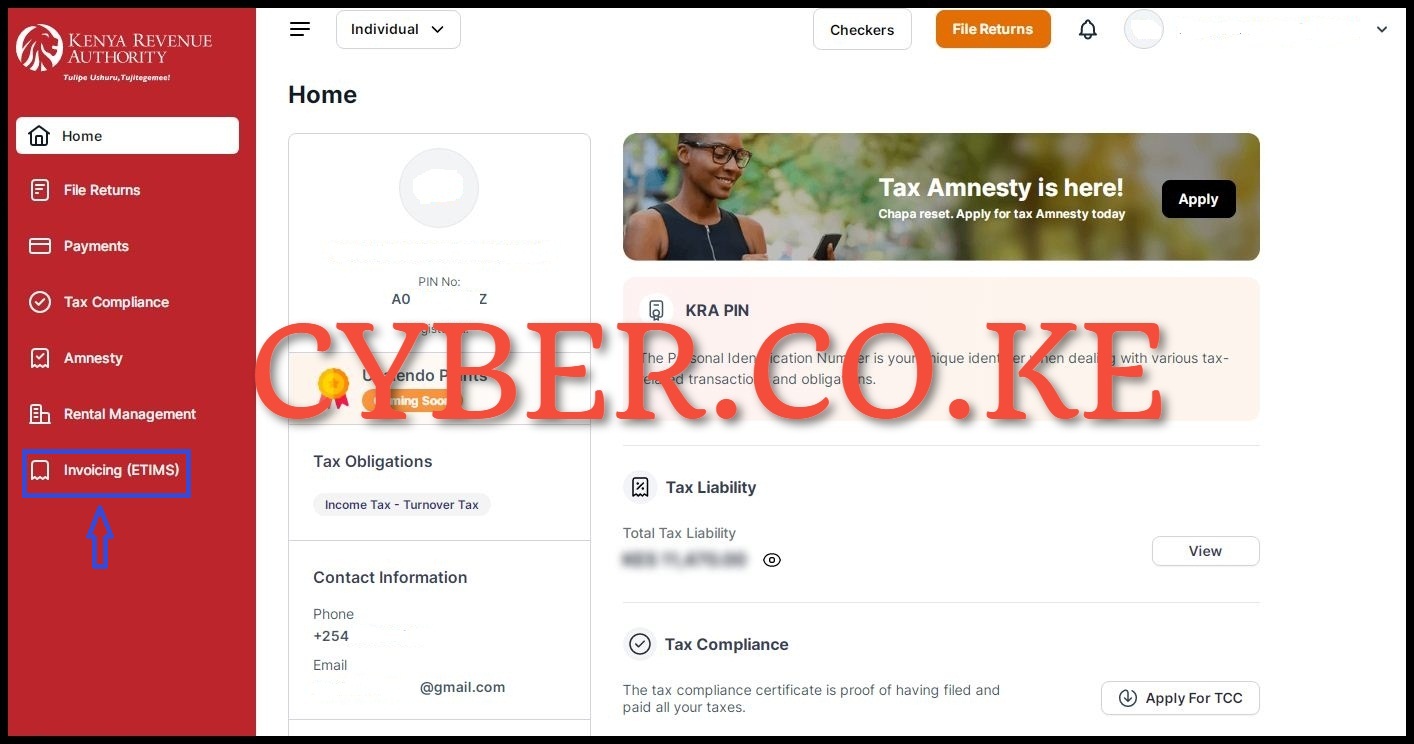
Next, on the left sidebar menu, click on “Invoicing (eTIMS)” the process of registering for eTIMS Lite using eCitizen account.
Step 9: Accept eTIMS Terms and Conditions and Privacy Policy
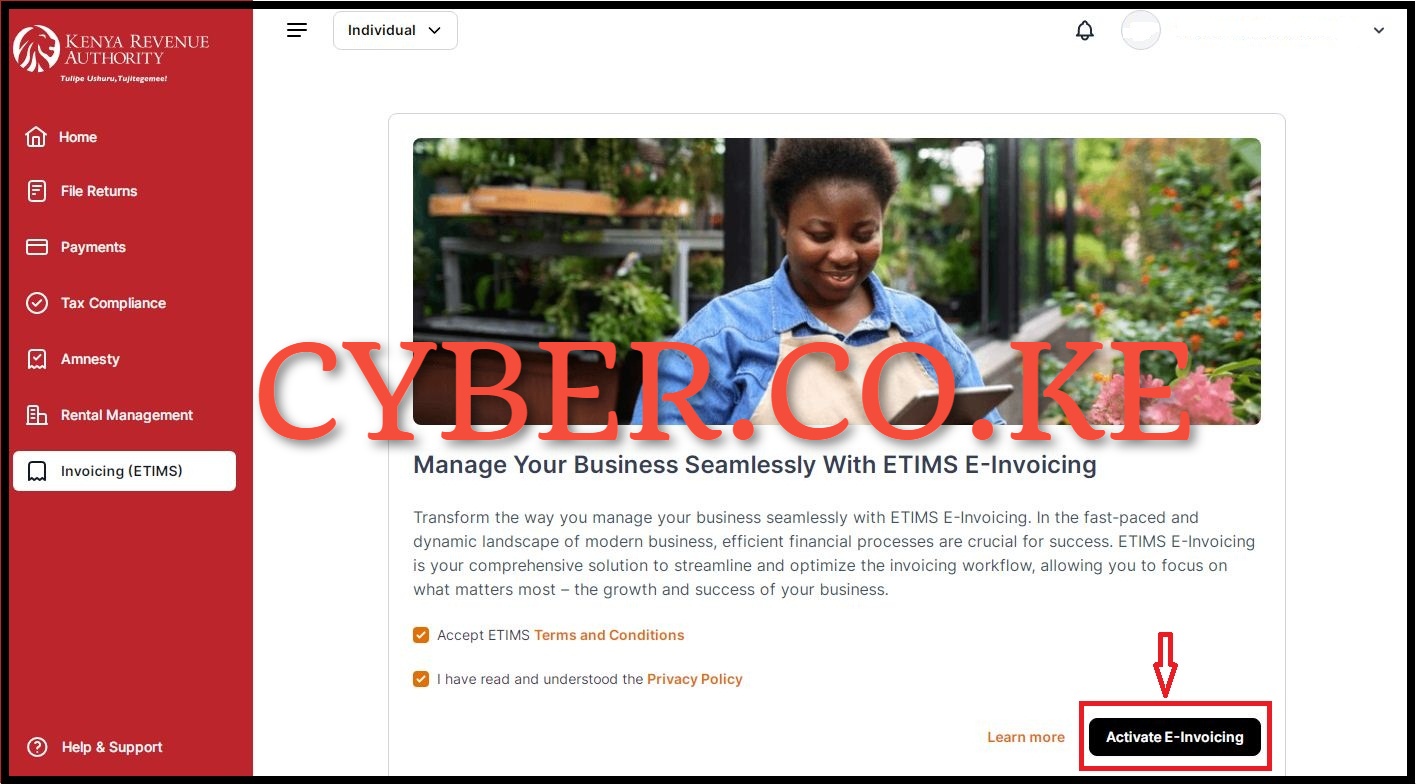
In this step, you need to read and accept the eTIMS Terms and Conditions together with the eTIMS Privacy Policy. To accept these two, tick on the respective check boxes. Once you have done all that, click on the “Activate e-Invoicing” button. This will in turn activate the features of the eTIMS Lite on eCitizen and you can start start generating eTIMS invoices using your eCitizen account. You will the message “Invoicing Successfully Activated” meaning that you have successfully activated Invoicing on eTIMS Lite (Web Based Solution).
Step 10: eTIMS Lite Invoicing Dashboard
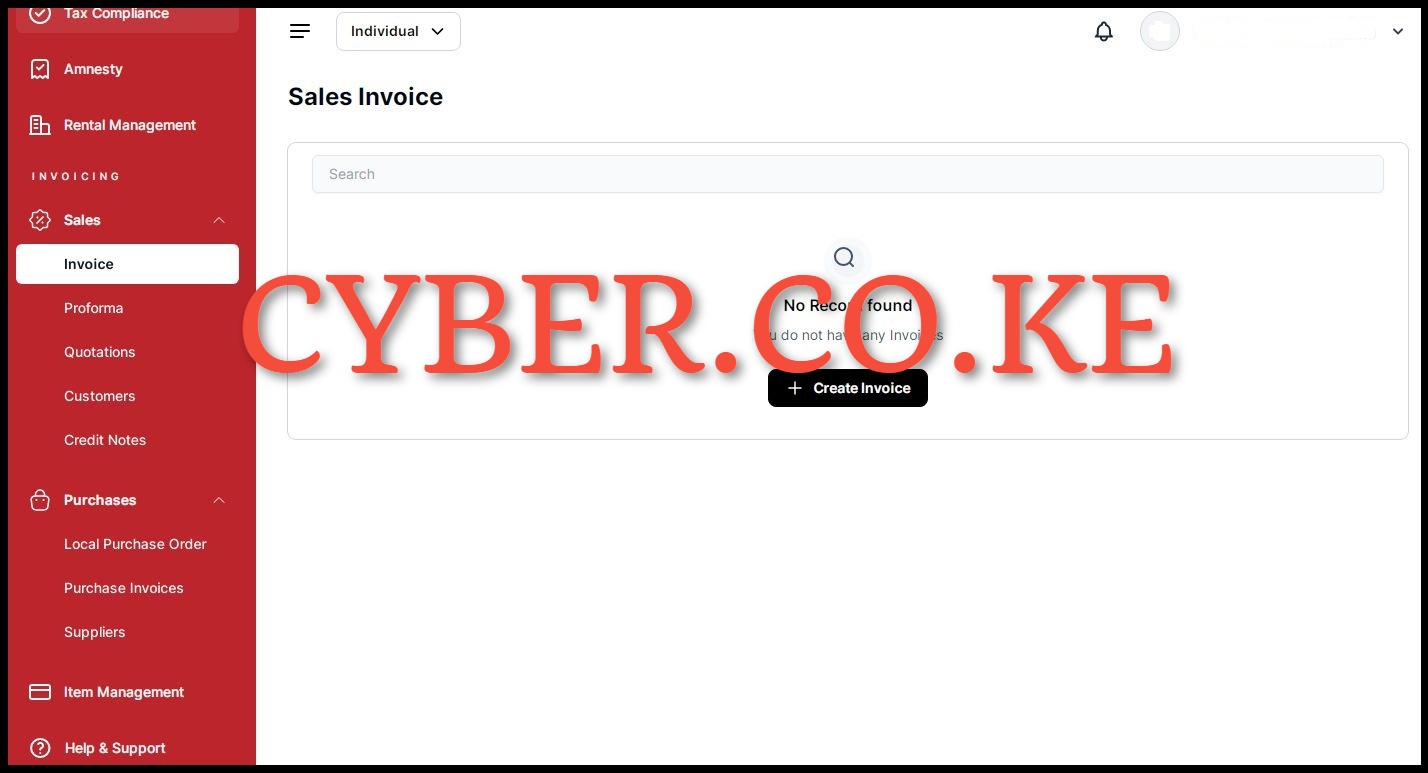
In the final step after activating Invoicing on eTIMS Lite, you will be redirected to the eTIMS Lite Invoicing Dashboard. On your eTIMS Lite Invoicing account dashboard, you will see the following eTIMS Lite features; Sales (Invoices, Proforma, Quotations, Customers and Credit Notes); Purchases (Local Purchase Orders, Purchase Invoices and Suppliers) and finally Items Management.
READ ALSO: How To Reset eTIMS Password on eTIMS Taxpayer Portal
The above outlined steps sums up the whole process that taxpayers need to follow to successfully register for eTIMS Lite (Web) using eCitizen account. As a reminder, registering for eTIMS Lite on eCitizen requires that you have with you an eCitizen account which you are able to login into. Also, you need to ensure that you already have a KRA PIN that is active and valid. Once you have met all the necessary requirements, you can follow the above steps that are invoved in the process of How To Register for eTIMS Lite (Web) using eCitizen account.
DON’T MISS OUT. CHECK OUT OUR TRENDING POPULAR BLOG POSTS IN KENYA.
How To Download KRA PIN Certificate Online (In 5 Steps)
How To File KRA Nil Returns For Students On iTax (KRA Portal)
How To File KRA Nil Returns For Unemployed On iTax (KRA Portal)
REGISTER KRA PIN NUMBER
How To Check If You Have Filed KRA Returns (In 4 Steps)
How To Change or Reset iTax Password Online (In 7 Steps)
How To Change or Reset KRA Password Online (In 7 Steps)
RETRIEVE KRA PIN CERTIFICATE
How To Change Email Address Registered On iTax (KRA Portal)
How To Apply For Tax Compliance Certificate On iTax (KRA Portal)
How To Download Tax Compliance Certificate On iTax (KRA Portal)
UPDATE KRA PIN NUMBER
How To Generate KRA Payment Slip On iTax (KRA Portal)
How To Download KRA Returns Receipt Online (In 5 Steps)
How To Check Your KRA PIN Using KRA PIN Checker (iTax PIN Checker)
CHANGE EMAIL ADDRESS
Stay Tax Compliant in Kenya
Contact our customer support team today for fast and reliable assistance with all your KRA Services via Call, SMS or WhatsApp - 0723 737 740 or alternatively send us an email using: [email protected] for prompt and immediate assistance today.
Our dedicated team is ready to assist you immediately you fill and submit your service request online. Whether you need help with Registering KRA PIN Number, Retrieving KRA PIN Certificate, Updating KRA PIN Number or Changing KRA PIN Email Address, we are here to assist you.
Get in touch with us today and experience professional online customer support.

