eTIMS (electronic Tax Invoice Management System) is a software solution that provides taxpayers with options for a simple, convenient and flexible approach to electronic invoicing. All persons engaged in business are required to on-board eTIMS and issue electronic tax invoices. The law requires that for any person to claim their business expense, the expense must be supported by an electronic tax invoice. Therefore, all persons engaged in business are required to issue electronic tax invoices, whether registered for VAT or not (non-VAT taxpayers). The good news is that you can easily register for eTIMS on eCitizen quickly and easily and start issuing eTIMS tax invoices to customers and clients in Kenya.
READ ALSO: Frequently Asked Questions About eTIMS By Taxpayers in Kenya
If you are in business and are registered for any of the following obligations, then you need to register for eTIMS using eCitizen. This type of eTIMS caters for all Non VAT Taxpayers in Kenya i.e. taxpayers who are not registered for VAT tax obligation. The following are the group of taxpayers who are required to register for eTIMS using eCitizen: Companies, Partnerships, Sole Proprietorships, Associations, Trusts, Individuals that are registered for the following KRA Tax Obligations: Monthly Rental Income (MRI), Turnover Tax (TOT), Annual Income Tax; Business persons in the Informal Sectors and Business persons not registered for VAT but supply VAT goods i.e. Hospitals supplying medical services.
How To Register for eTIMS
The following are the 10 main steps involved in the process of How To Register for eTIMS that you need to follow.
Step 1: Visit ecitizen.kra.go.ke
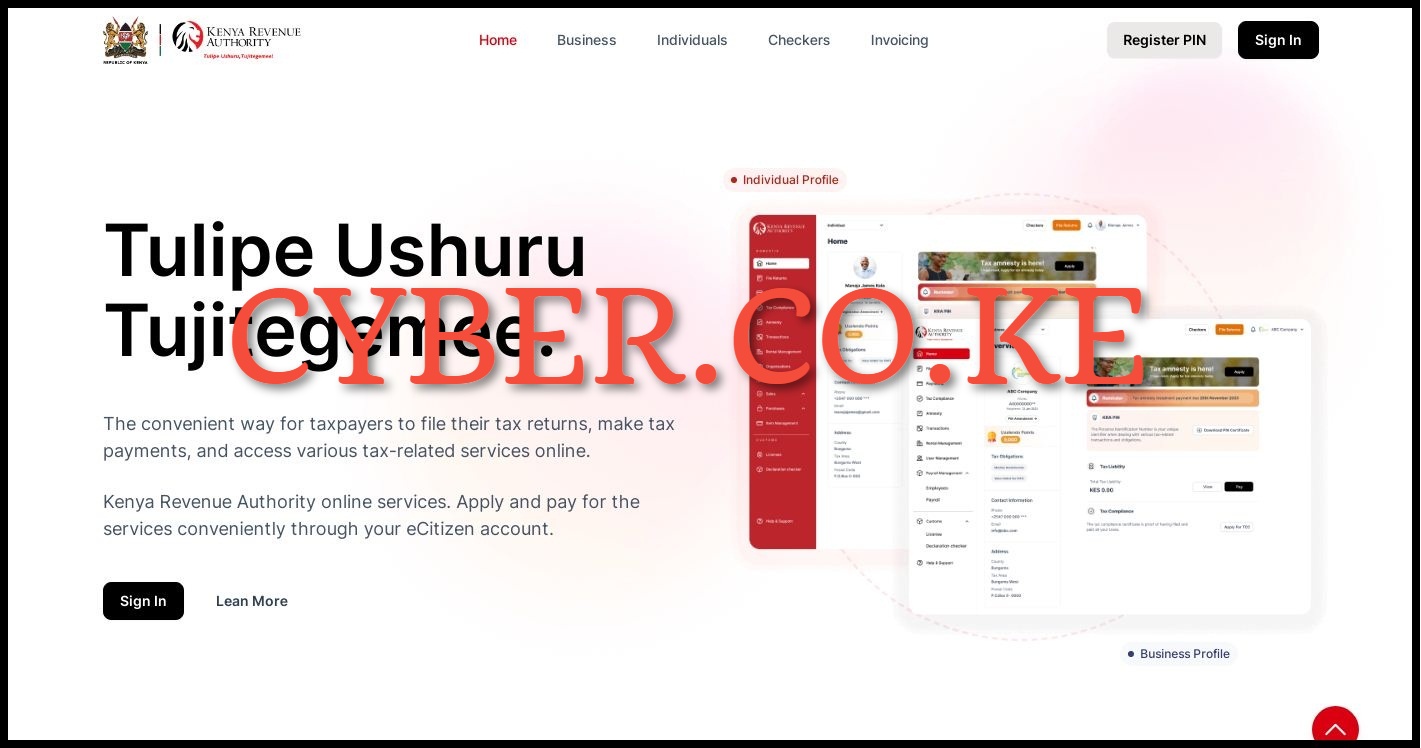
The first and foremost step in the process of registering for eTIMS using eCitizen is to visit ecitizen.kra.go.ke
Step 2: Click on Sign In Button
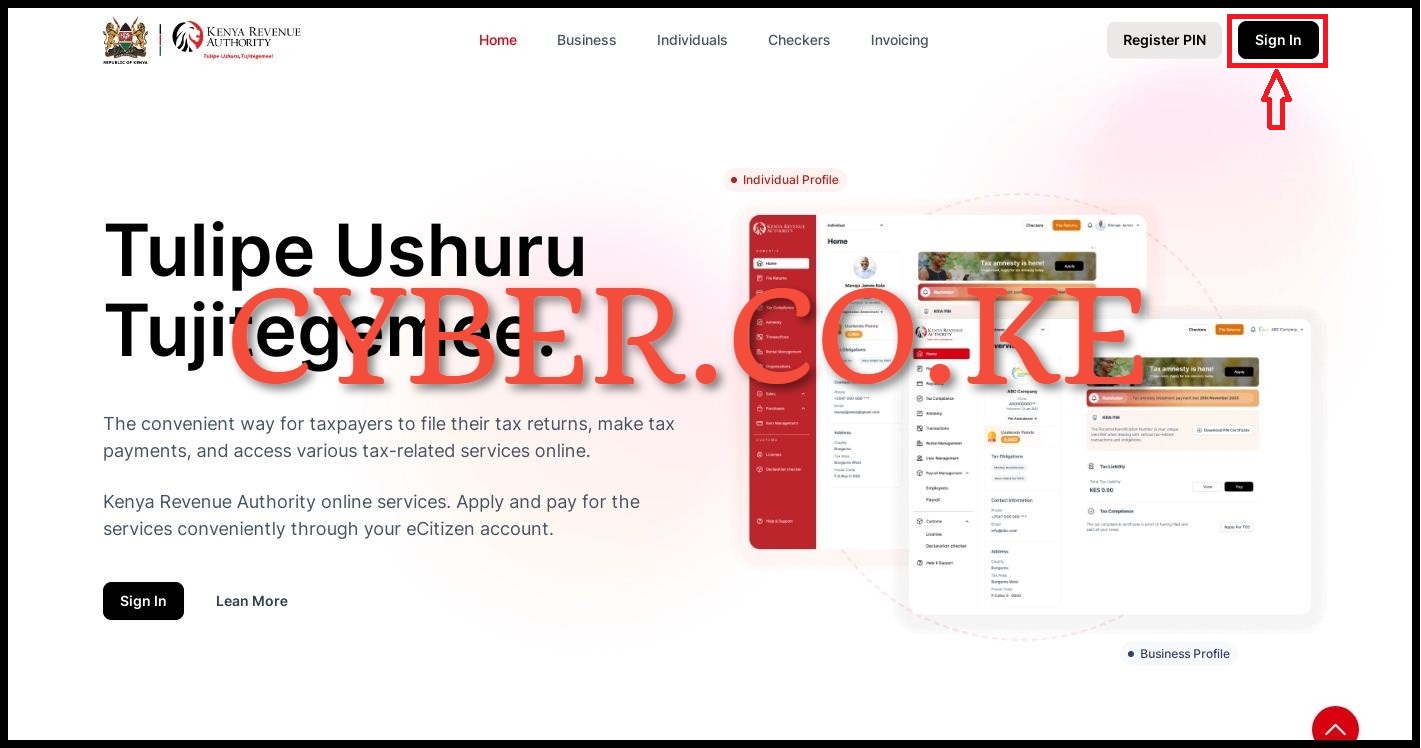
Once you are on ecitizen.kra.go.ke, on the top right hand side click on the “Sign In” button to begin the process of accessing your eCitizen account.
Step 3: Login Into eCitizen
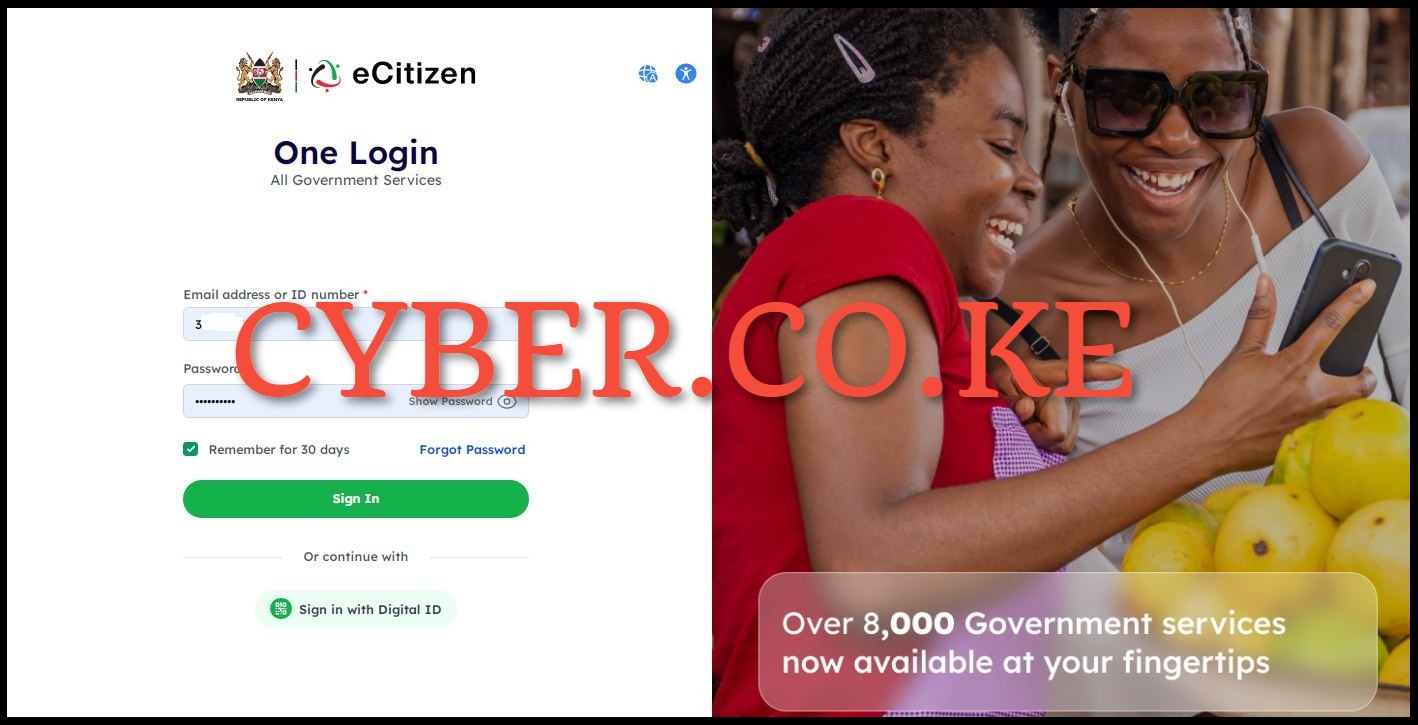
In this step, you need to login into your eCitizen account by entering your ID Number or Email Address, eCitizen Account password and then click on the “Sign In” button.
Step 4: OTP Verification
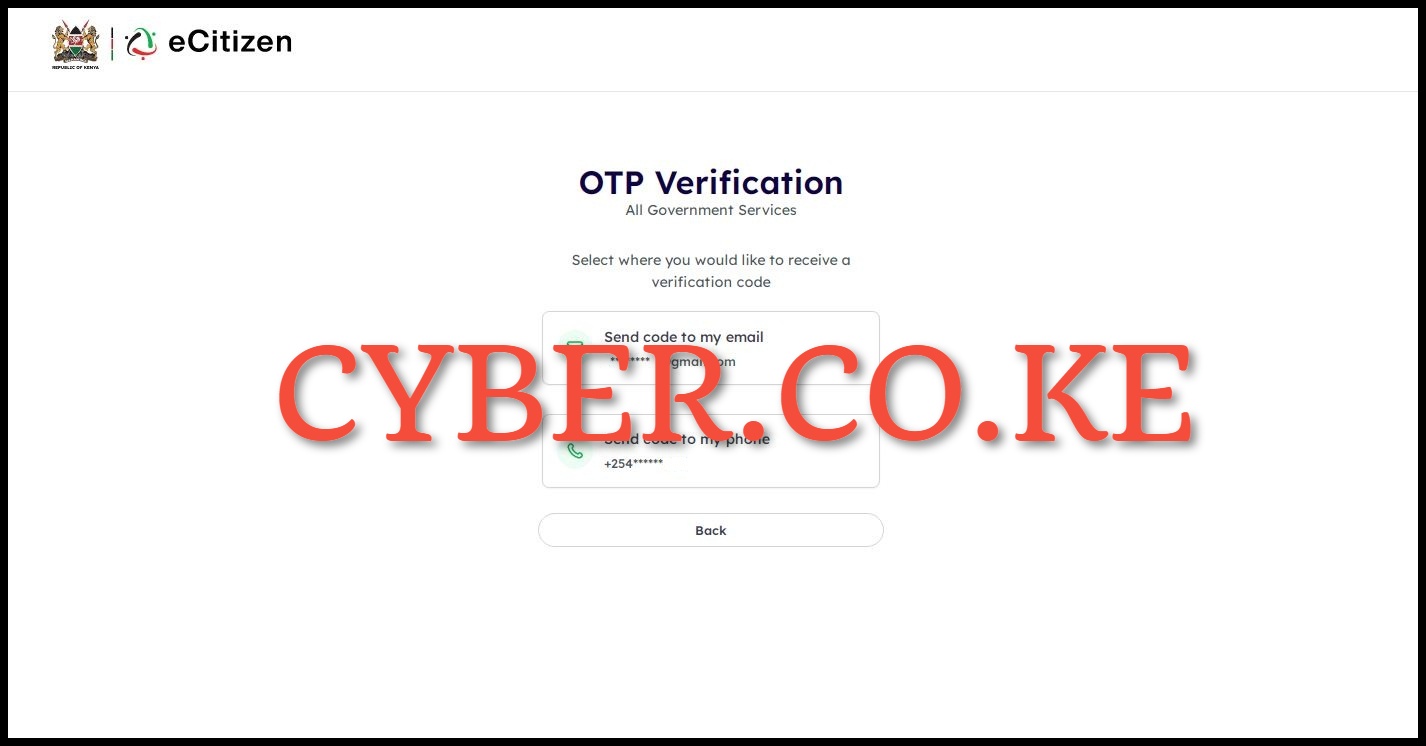
If you have enabled Two-Factor Authentication (2FA) on your eCitizen account, you will be prompted to select a method of receiving the OTP verification code either via email address or phone number (mobile number).
Step 5: Enter OTP Verification Code
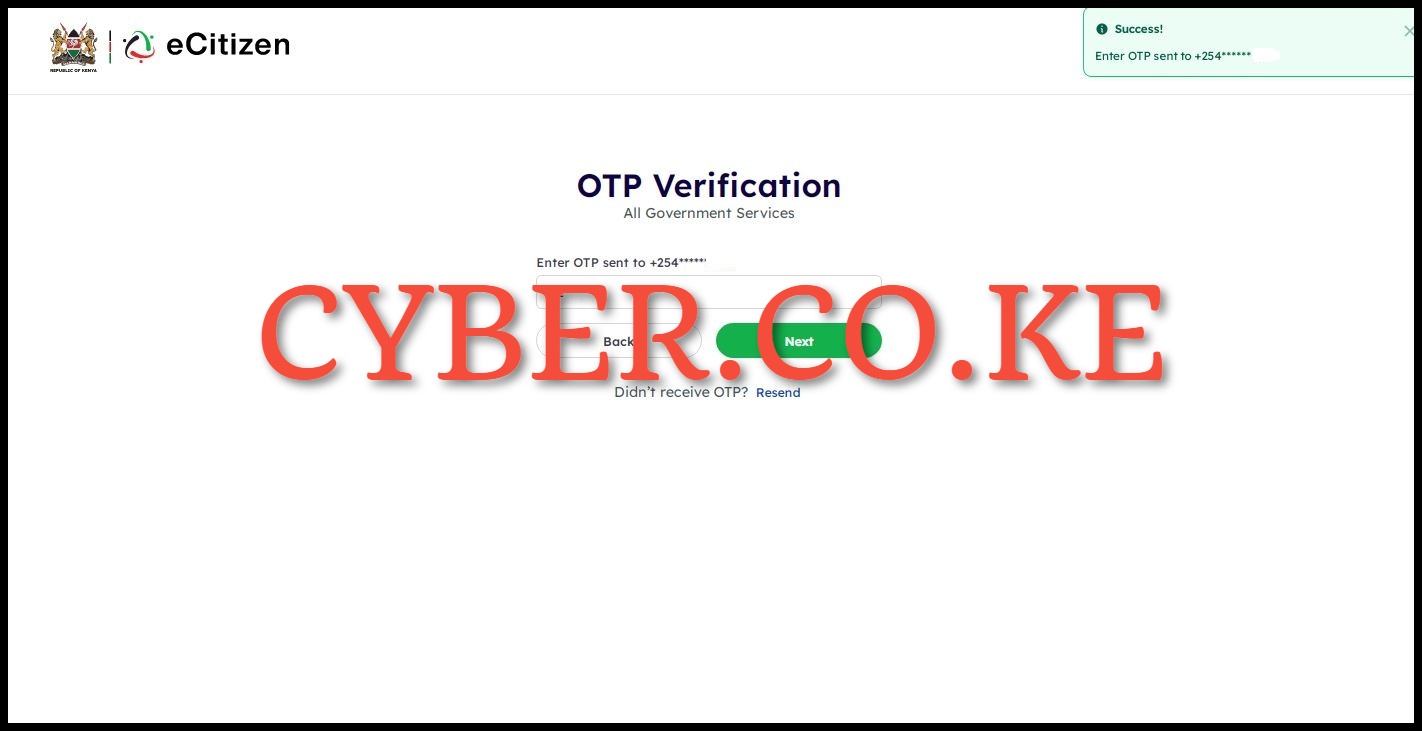
In this step, you need to enter the OTP Verification code that was sent to your email address or phone number. Once you have entered the eCitizen account OTP verification code, click on the “Next” button.
Step 6: Oauth Consent Screen
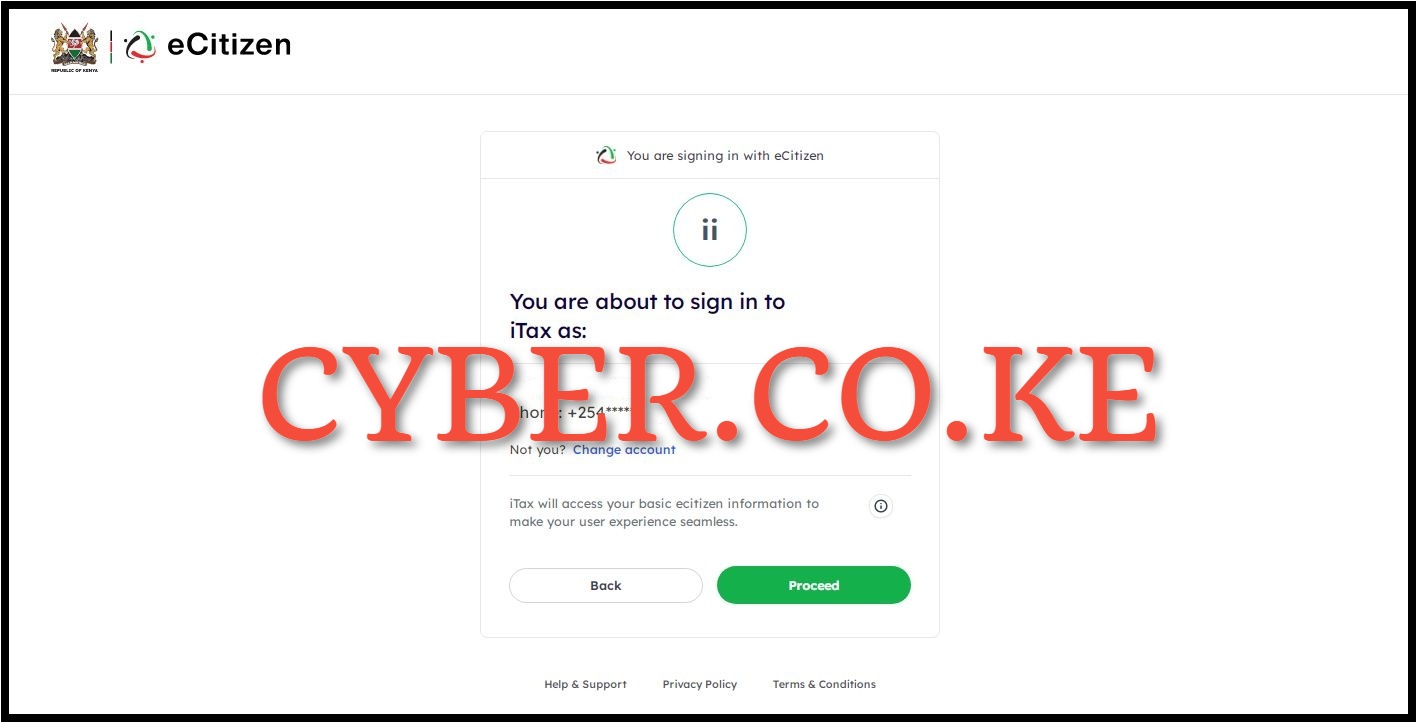
Next, you will the Oauth Consent Screen telling you “You are about to sign in to iTax as:” an individual or business depending on which one you select. In our case, we are signing in as an individual. Click on the “Proceed” button.
Step 7: ecitizen.kra.go.ke Account Dashboard
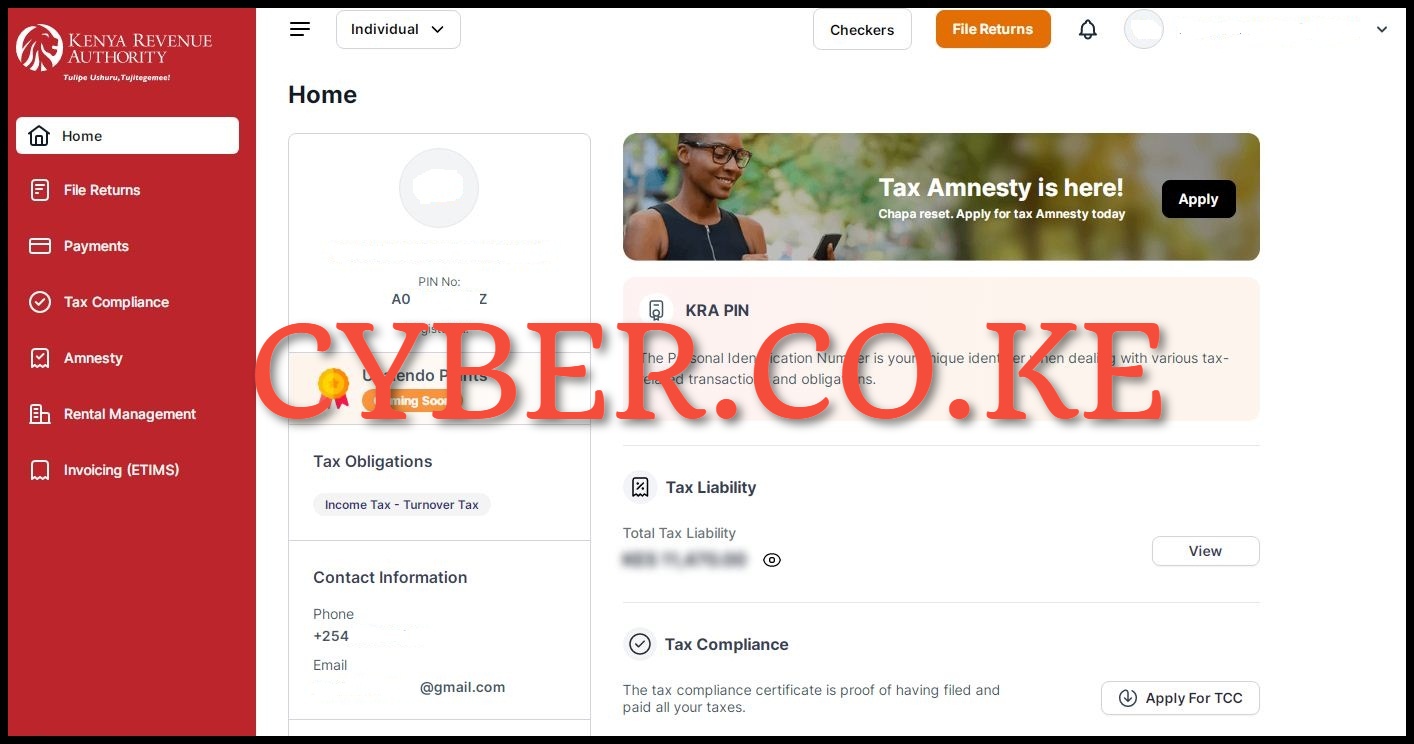
Once you have successfully logged into ecitizen.kra.go.ke, you will be able to access the account dashboard where you can now start the process of registering for eTIMS using eCitizen account.
Step 8: Click on Invoicing (eTIMS)
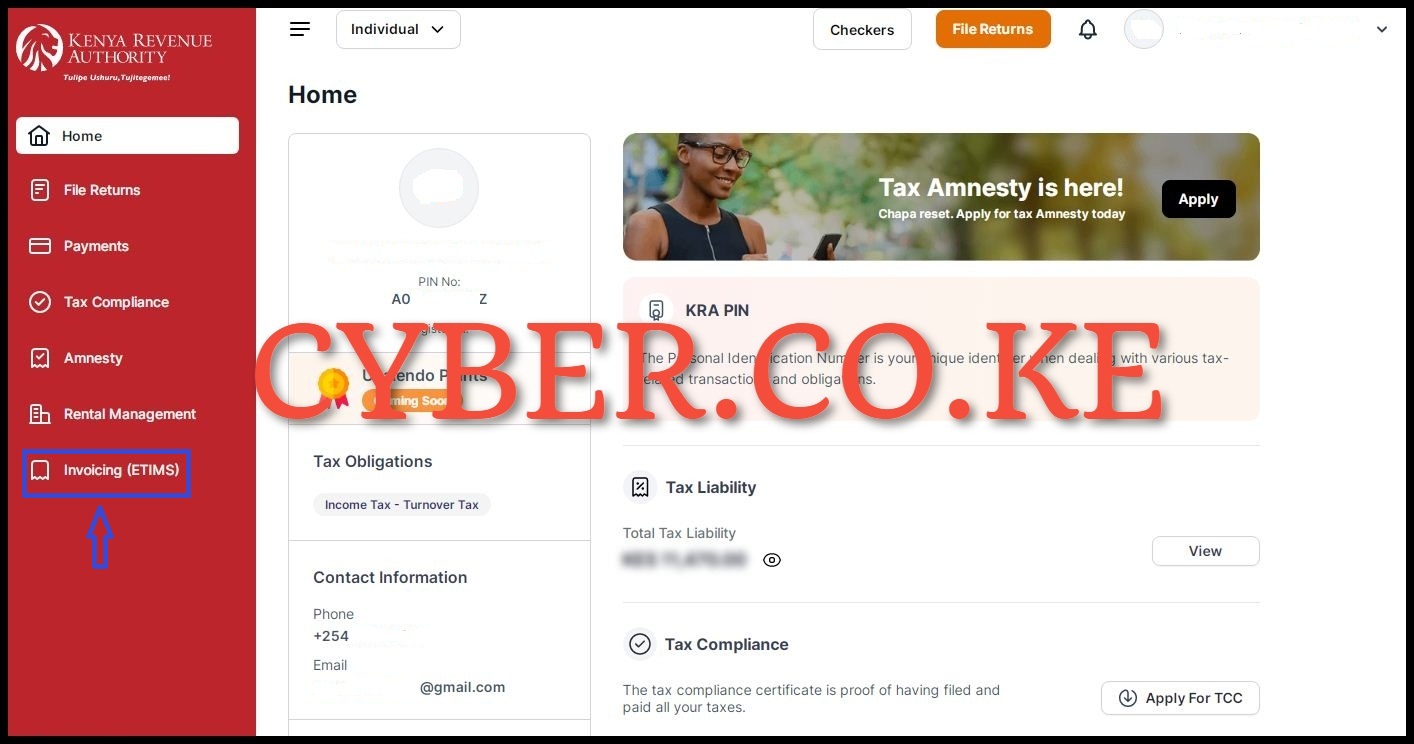
In this step, on the left side panel in the account dashboard, click on “Invoicing (eTIMS)” to initiate the process of registering for eTIMS online using eCitizen account.
Step 9: Accept eTIMS Terms and Conditions and also the Privacy Policy
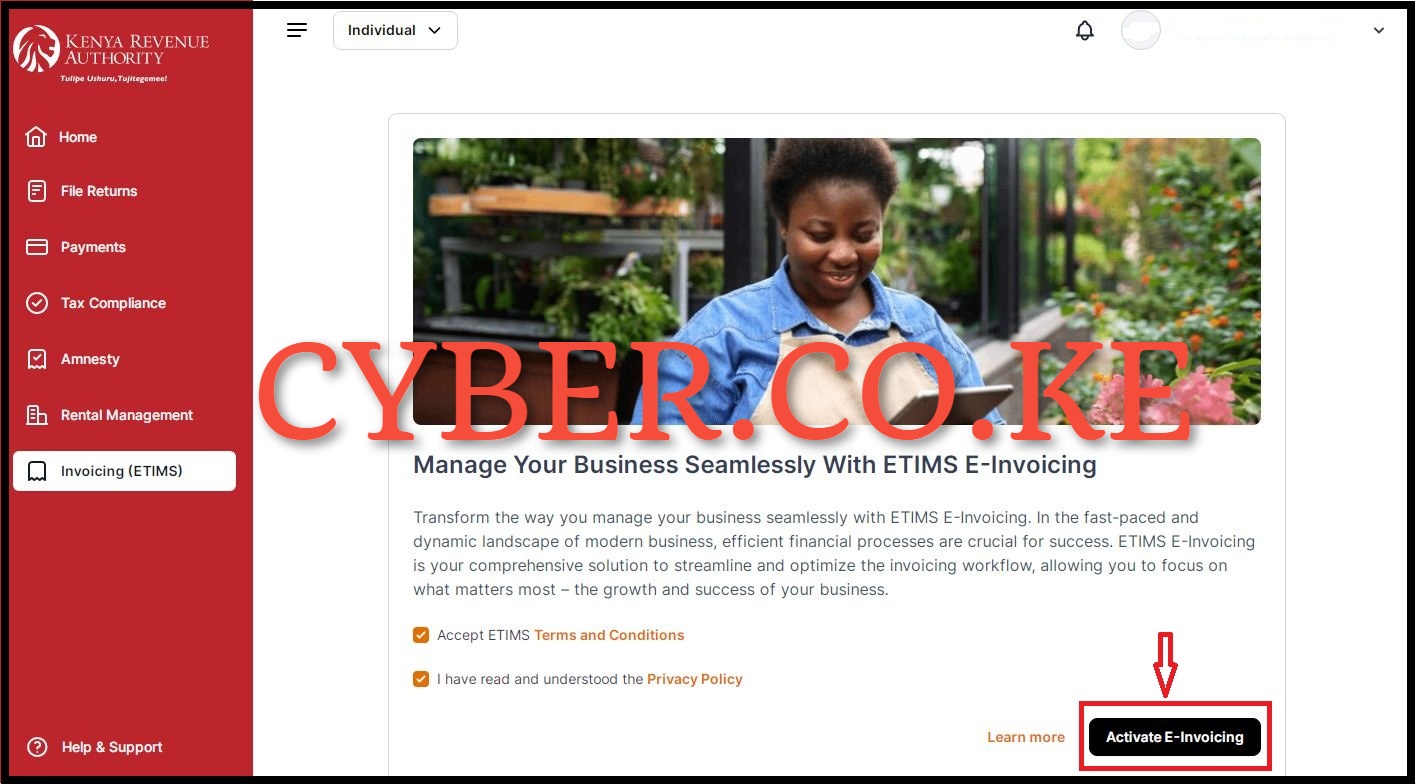
Next, you will need to accept the eTIMS Terms and Conditions and also the Privacy Policy by ticking on the respective check boxes. You can also read through the brief description: “Transform the way you manage your business seamlessly with eTIMS e-Invoicing. In the fast-paced and dynamic landscape of modern business, efficient financial processes are crucial for success. eTIMS e-Invoicing is your comprehensive solution to streamline and optimize the invoicing workflow, allowing you to focus on what matters most – the growth and success of your business.” Once you have done all that, click on the “Activate e-Invoicing” button. You will see the message “Invoicing Successfully Activated” meaning that you have successfully activated eTIMS Invoicing.
Step 10: eTIMS Invoicing Dashboard
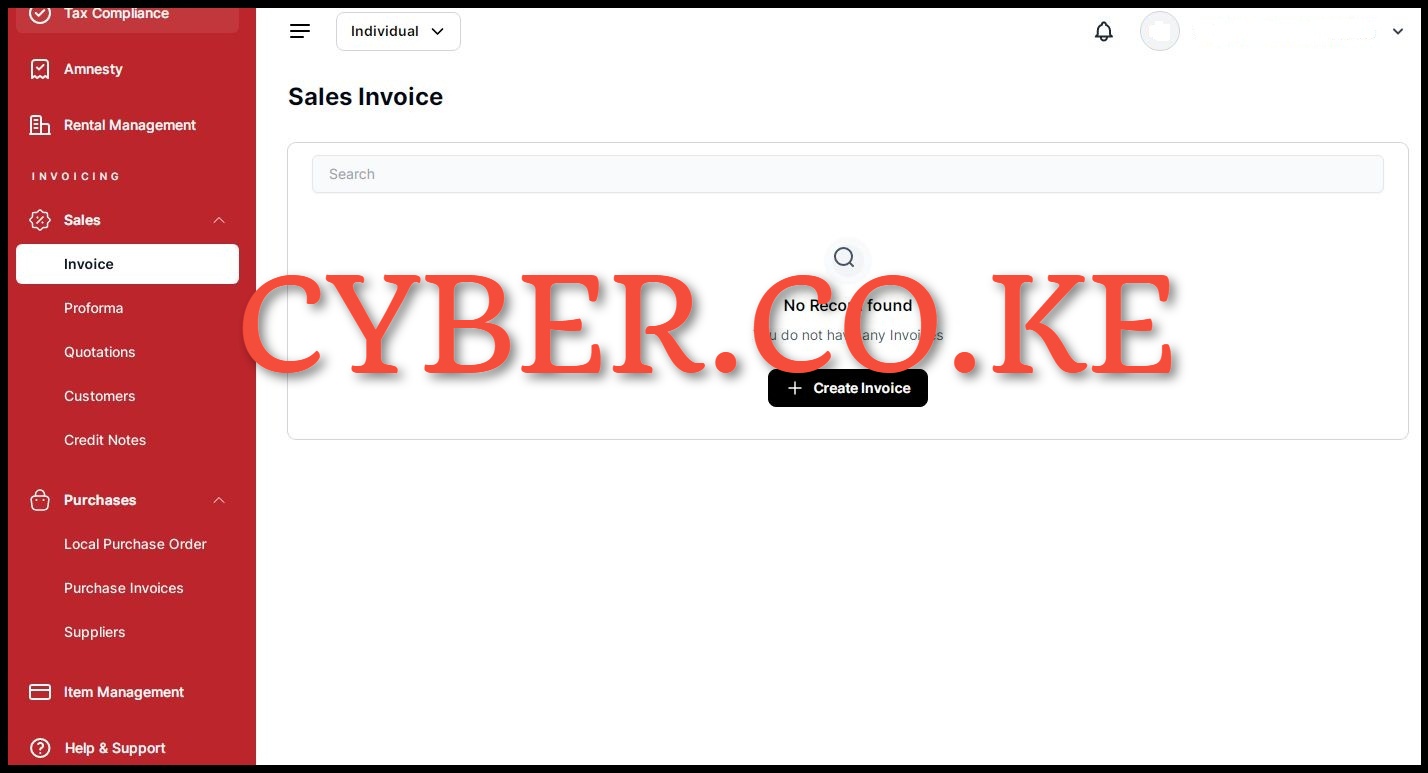
Once you have successfully activated eTIMS Invoicing, you will be redirected to the eTIMS Invoicing Dashboard where you can now generate invoices via eTIMS. On the left side menu, you will see: Sales (Invoices, Proforma, Quotations, Customers and Credit Notes); Purchases (Local Purchase Orders, Purchase Invoices and Suppliers) and finally Items Management.
READ ALSO: Types of eTIMS Solutions That Taxpayers in Kenya Can Use
The above steps sums up the process of registering for eTIMS online by using eCitizen. Important things to take note of is that registering for eTIMS using eCitizen is for Non VAT Taxpayers as mentioned at the beginning of this blog post. Also, you need to ensure that you are able to login into eCitizen account using both your ID Number or Email Address and the eCitizen account password. Afterwards, you can follow the above listed steps to register for eTIMS online using eCitizen account quickly and easily.
DON’T MISS OUT. CHECK OUT OUR TRENDING POPULAR BLOG POSTS IN KENYA.
How To Download KRA PIN Certificate Online (In 5 Steps)
How To File KRA Nil Returns For Students On iTax (KRA Portal)
How To File KRA Nil Returns For Unemployed On iTax (KRA Portal)
REGISTER KRA PIN NUMBER
How To Check If You Have Filed KRA Returns (In 4 Steps)
How To Change or Reset iTax Password Online (In 7 Steps)
How To Change or Reset KRA Password Online (In 7 Steps)
RETRIEVE KRA PIN CERTIFICATE
How To Change Email Address Registered On iTax (KRA Portal)
How To Apply For Tax Compliance Certificate On iTax (KRA Portal)
How To Download Tax Compliance Certificate On iTax (KRA Portal)
UPDATE KRA PIN NUMBER
How To Generate KRA Payment Slip On iTax (KRA Portal)
How To Download KRA Returns Receipt Online (In 5 Steps)
How To Check Your KRA PIN Using KRA PIN Checker (iTax PIN Checker)
CHANGE EMAIL ADDRESS
Stay Tax Compliant in Kenya
Contact our customer support team today for fast and reliable assistance with all your KRA Services via Call, SMS or WhatsApp - 0723 737 740 or alternatively send us an email using: [email protected] for prompt and immediate assistance today.
Our dedicated team is ready to assist you immediately you fill and submit your service request online. Whether you need help with Registering KRA PIN Number, Retrieving KRA PIN Certificate, Updating KRA PIN Number or Changing KRA PIN Email Address, we are here to assist you.
Get in touch with us today and experience professional online customer support.

